28 February 2011

Herb Crate Project Complete

Last week I told you all about my fabulous Marshalls find. By some stroke of luck, I walked into (not my usual) Marshalls and spied these beauties: 


What's the big deal about a bunch of herb crates? I've been eyeing these babies up for almost a year now. I told you how I've become an avid follower of Layla and Kevin and their blog The Lettered Cottage. They have these crates hung up in their kitchen as seen in the below picture. I've been hooked and on the hunt for a similar set ever since. Little did I think I'd find the exact herb crates while visiting Marshalls completely on a whim.

photo courtesy of The Lettered Cottage

Well this past weekend we finally hung our crates up. I really had no intention of even bothering to hang them until after we replaced the carpet. But we were in Home Depot yesterday picking up some goodies and Jordan asked if I wanted to tackle them along with our other projects we had lined up for the day. I figured, why not? The only reason I had put it off was because I think they will look 10 times better with wood flooring underneath, plus we needed to buy hooks in order to hang them. Being a pretty impatient person who wants to tackle things as soon as I think them up, all I needed was a little nudge from the hubby and I was ready to move on with the project. So off we went on the hunt for some hooks to properly hang the crates.

This little piece of wall that sticks out in our living room is where we chose to hang the crates. There is little to no wall space in our kitchen, and what we have is obstructed by a large light switch. This piece of wall faces directly into our open kitchen (see yesterday's post for kitchen layout) and once the carpet is out and the hardwood is it, it will flow even better and make more sense.


It took little to no time to figure out the spacing of the crates and get them hung. The only hiccup we ran into was that it would be way to crowded to hang all four of them on the same wall without things starting to look a little junky. I opted to leave out the smallest herb crate and find another place in the house to use it. Not quite sure yet where we will put it. Possibly in the kitchen to hold bills or completely relocate it to the dining room or bathroom. 

Here are the herb crates as they look today:


Notice I took down the Audrey picture. It was looking a little too crowded along that wall. She will be relocating somewhere else in the house. Possibly in the new office in the basement. 


The plant in the middle crate is from IKEA and the white plate is (I'm pretty sure) a thrift find. I know it looks almost identical to what TLC filled their crates with, but for the time being I'm not sure what else to put in them. The bottom crate is currently empty until I figure something out. I may try to bring some of the teal from the kitchen accents into this wall, but for now it will remain as is.

The hooks we used were simple oil-rubbed bronze robe hooks that we purchased at Home Depot for $2.98 a piece. I chose the dark hook to match the wire that came out of the crates. These were the smallest hooks we could find for a decent price that didn't come in plastic or look too metal/industrial. I wanted them to be sturdy enough to hold the crates while blending in as much as possible. 


I am so happy with how they turned out. They honestly look even better than I was hoping. One more project off the list!

27 February 2011

House Tour: Kitchen (Redo)

I posted a kitchen tour a few weeks ago but was never really happy with how the pictures came out. Since I have been getting better with my camera lately, I decided to scrap that post and take a fresh batch of photos to redo the kitchen tour. 

We have an open floor plan from our kitchen into the living room. This is perfect for us when entertaining since we live in a small townhouse and our kitchen is in the middle of the first floor. The downside to this is that there are no windows in the kitchen for any natural light to come in. Fortunately, the open floor plan allows light from the living and dining rooms to creep in. Unfortunately for the must part we still need to turn lights on when in the kitchen. Hence the massive amounts of lighting - recessed, pendant and even under counter lights.


This is pretty much how the kitchen looked upon moving in except for two minor changes. First we repainted the walls that were originally a darker brown-tan. Secondly, I took the doors off two of the cabinets above the sink. I love the look of open cabinetry and after debating it for a year decided to take the plunge one night while the hubby was at work. After shuffling around the dishes and tupperware that I didn't want showing, I am very happy with the results.Other than those two changes, we were fortunate that the kitchen came with the stainless steel appliances, gorgeous tile floor, new cabinetry and custom tile backsplash.


An alternate view from inside the kitchen. Sorry for the poor lighting. Just a side effect of that middle-of-the-house, poor natural lighting thing I was talking about. The door next to the dining room and across from the fridge leads to our basement.


Although I wasn't crazy about the tile backsplash at first, I've really grown to love our kitchen. I was afraid that the blue-grey tiles would keep me restricted in my decor and keep the kitchen looking dark. After throwing in some natural baskets and jute as well as white and teal accents to soften things up, I couldn't have been more wrong.

A few more shots.


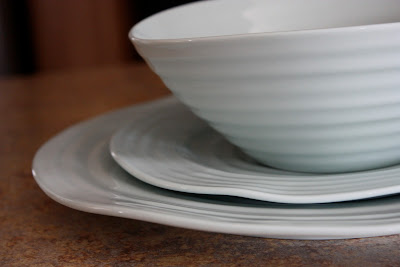
If you are wondering about our dishes, they were part of our wedding registry. They are the Sophie Conrad Dinnerware for Portmieron collection in Celadon. We received our dinnerware from Bed, Bath and Beyond, but it is also available at Macy's, and in a variety of other colors. 


I love how each piece is unique with it's perfectly imperfect edges. 

In non-kitchen related news today was an absolutely gorgeous day - both weather and otherwise. Hubby had off from work and we took full advantage by spending some QT with the family and taking time to knock out a few things on our to-do list. The biggest thing we tackled today was starting to paint the nursery. We need to buy another gallon of 'Sharkey Grey' before we add a second coat as I underestimated when I purchased paint for the hallway. Pictures to follow later this week.

Up until today, this was the most progress I had made in the nursery:
Not exactly a decor update, but shopping for my baby girl has become one of the best projects I've taken on for the nursery. :)

Hope you all had a great weekend! 

26 February 2011

House Tour: Master Closet

I'm rewarding myself today with a coffee. Ok, it's decaf, but still I've cut coffee out all together so even a cup of decaf is a treat. Today is one of the first Saturdays that I didn't have plans and was been able to spend at home, so I took full advantage.  I woke up around 7am when hubby left for work and began doing things around the house. By 11:30 I was feeling pretty accomplished between cleaning, organizing and taking pictures for the blog.

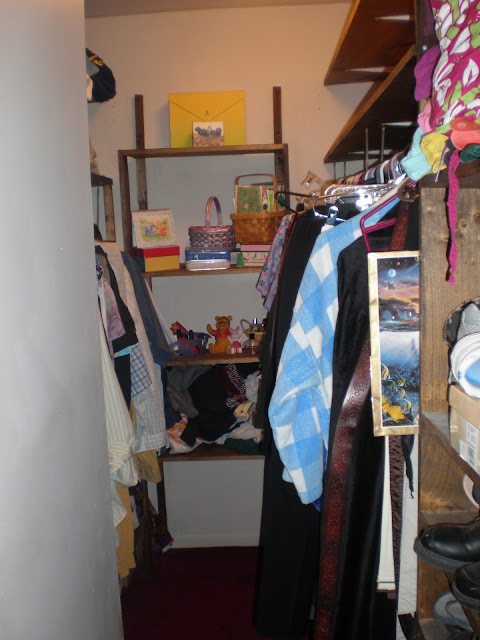
One of the big projects I did today was clean out and organize my closet. I don't have any sloppy, before pictures pre-organization, but I do have some from before we moved in. My closet needed a lot of work for a few reasons. I needed to go through my clothes and get rid of what I don't wear, relocate what I can't wear this summer due to my growing belly, and move hubby's items into his closet in the hall (more on that later). After I was finished I figured there was no better time to snap a few shots and give you all a tour. 

Of course, let's start with the closet pre-moving in.
Dark wood, white walls and that icky cranberry carpet snuck in from the master bedroom.

Let's take a peek at the closet today:


I have a lot of shoes, but what girl doesn't? I wish I could say that I wore them all.

The best part about a walk-in closet just being able to see all of my clothes at once. The fabrics, colors, patterns, everything is so inviting. Plus it makes choosing what to wear everyday a million times easier since everything is in one place. Other than basics like socks and underwear, everything I wear is in this space. Hubby has the dresser and hall closet for his clothes. He actually volunteered for that closet, so don't think I'm a bad wife.
Dresses, dresses, dresses! Take up the whole left side.

I somewhat organize by cardigans, long sleeves, then short sleeves,


vests and tanks,

and finally skirts.

The built in shelving is not only great for shoe storage, but also for jewelry.


These pieces are actually all vintage jewelry that belong to my grandmother. She gave them to me a few years ago since she has stopped wearing most of her items.


The shelving to the left of my dresses is for bags, clutches, scarves, and belts:
Most of these clutches are thrift store finds that I purchased for $2 and less each.


These are actually the bags that my bedding came in. 
I use them now to hold stockings in one and swimsuits in the other.

One more thing in my closet. See this plastic boxed tucked away in the corner?

It actually holds almost two dozen pairs of vintages gloves, also given to me by my grandmother. Although I haven't worn them, I absolutely love them and refuse to get rid of any.


I mentioned that hubby has his own closet in the hallway. Here is a quick before.

After moving the rest of his clothes and doing a mini-organization project, the closet now looks like this:


Happy Saturday!