28 April 2012

Vacation & Caught My Eye: 4.28.12


WE ARE GOING ON VACATION. A little get away for some R&R, sun and sand. And boy do we need it. We leave early Monday morning so unless I get some sort of inspiration while laying in the sun, blogging may be slow for the next week. 

In the meantime, here are a few things that caught my eye this week:


Check out this rainbow birthday party invitation template. With just under three months to go, I'm already mentally planning Lucy's first birthday party.


I may have given this blog a shout out before, but you should check out Meggan's take on home birth, homemade baby food and other topics on organic mothering.


Earth Day was this past week. Check out the card Danielle made over at Neat&Tangled using recycled materials. 


I love this idea. Movie theatre/restaurant in one??


Jo always has great gift guides. This one's for Mother's Day. 


This picture is inspiring me to take up watercolor painting.


Has anyone done Project Life? I'm dying to. Just can't decide when to start.


I wear my denim shirt probably too much, but I'm all about this trend. 


Who doesn't love free art?


I'm a bit obsessed with all these amazing Photoshop tips


So dainty.


Speaking of jewelry, I'm on the hunt for the perfect thin gold ring. Or a dozen.


In other news, I signed our baby girl up for the Gap casting call modeling contest. Check out her entry here, and feel free to 'Like'! I'm not sure if the likes even do anything. Gap chooses the finalists mid May to vote. 

26 April 2012

All You Need is LOVE is All You Need


I mentioned on Monday that I did purchase one item while at Clover Market. The vendor I bought from was Black Heart Letterpress. I'm a lover of all things letterpress. I searched for weeks finding the perfect letterpress invitations for our wedding. I was so determined that I was going to have letterpress invites. There's just something about the finished look of a piece of stationary or card made in letterpress that I love. I prefer that over a glossy standard printed card or invitation any day.

Black Heart Letterpress specializes in custom designs of greeting cards, invitations, coasters, prints, and more. After I brought my card home I made sure to check out their website to see what else they offer.

You'll notice thay have a lot of Philadelphia-themed pre-made pieces, which I'm a fan of since my mom's side of the family is from Philly. Here are just a few pieces that caught my eye. 


This is the card that I purchased from Black Heart Letterpress. When I purchased I knew I wasn't planning to use the card for it's actual purpose as a card. I loved the print, the saying, and even the color of the letterpress and thought it would look great in a simple white frame.


Here is just a snap of how the card was packaged, with a copy of their logo and website address packed on the back of the packing. It obviously came with an envelope, which I don't need, so I just stashed that away in case I need one for something later.

I used an Ikea Ribba frame for the card and added it to the newly updated gallery wall in our living room. I'm still filling a few of the frames on the wall. As I've mentioned a few times I've been trying to brighten up the space in our living room and I just felt that the dark frames on the small piece of wall were crowded the space. Plus with all the dark furniture we have, it was just overkill. I recently swapped out the frames for all white and have been in the process of replacing the wedding photos with prints and other family photos (aka Lucy). Hope to finish up this weekend!


Be sure to check out Black Heart Letterpress sometime!

24 April 2012

Lucy's 9 Month Milestones


I feel like I just posted her 8 month update. 9 months just seems so old and our little girl just seems so big these days. It amazes me how much she develops each month and how different she looks in pictures just weeks apart. I love to just watch her when she's playing independently and interacting with her toys. I'd love to know what goes through her mind sometimes. 

We have her 9 month appointment this Friday and will find out her current weight and length (and if she's still super tall for her age). 
  • Lucy now has one and a half teeth on the bottom
  • She is eating two solids a day - usually cereal and either a fruit or vegetable - along with her usual diet of breastmilk. Keeping all solids organic.
  • We've also given her a few dissolvable finger foods that she will feed herself, but she mostly likes to play when them.
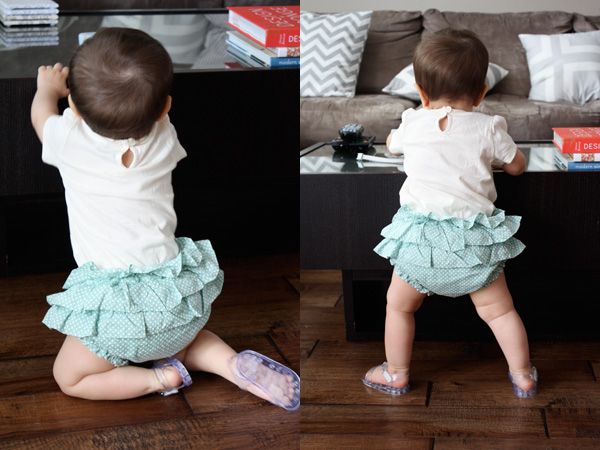
  • She is a crawling machine, but is already trying to walk. She stands up any chance she gets and scoots around while holding onto tables, chairs, people's legs, etc.
  • She claps and waves a lot now and is starting to react when you clap or wave to her.
  • She still laughs so much. It's my absolute favorite sound (until that little voice starts talking.)
  • We have slowly been transitioning Lucy to sleep in her crib at night. It isn't easy and some nights she only makes it half way before we bring her into our room because she just won't sleep. We've had one night that she lasted until 6am, so we are being patient. Each night gets a little better.
  • For the most part her talking is still babble, but she is learning new sounds all the time (for example, she recently started saying 'fffff'). She did say 'hi' to my mom the other day, but I can't get her to say it to me. Again, we are being patient. She will talk when she's ready to chat.
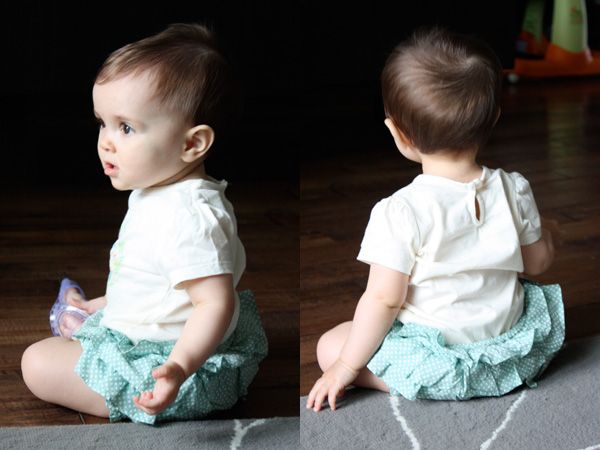
  • You can see in the photos she is tugging at her ear - Lucy's sign of being sleepy. I was able to get a few good shots before she was over the camera.
  • She is pretty on target with her age and the size clothes she wears., but I think her feet are small. She's wearing size 3 in shoes and even then, they are sometimes big.

23 April 2012

Clover Market

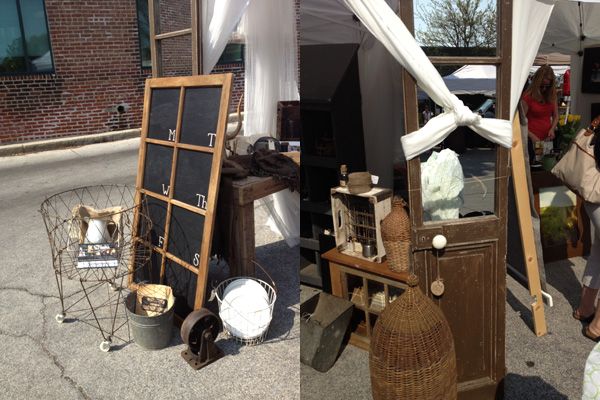
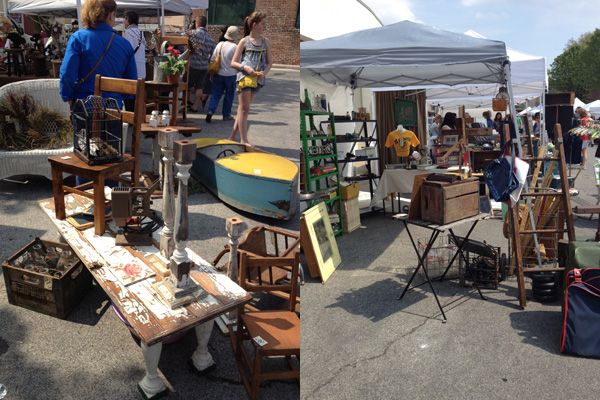
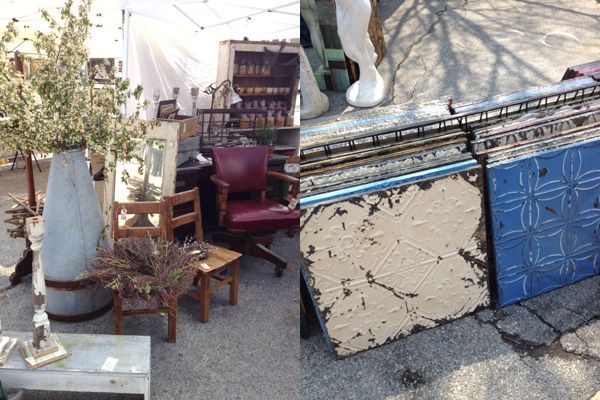
Last weekend, my friend Amy and I hit up Clover Market in Ardmore, PA. Neither of us had been to this vintage outdoor market before, but we were both incredibly impressed. Clover Market feature vendors selling antiques, clothing, jewelry, crafts, and other great handmade and vintage finds. 

Clover Market is open one Sunday each month during the Spring and Fall months. The next one is May 6th. You can read a little more about Clover Market on their blog.

While I didn't come prepared with my 'good' camera, I did snap a few shots on my phone to share with you all. 

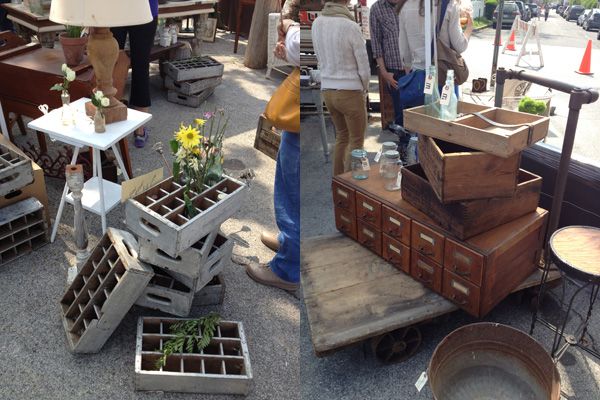
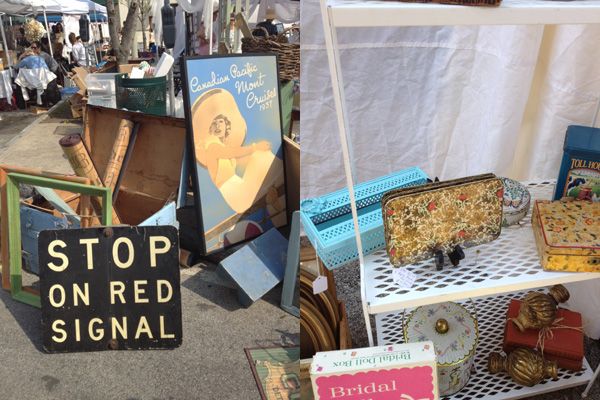
How great are all these storage boxes? Jordan and I have been wanting to find a card catalogue for our dining room to store wine. We're looking for a larger version than the one below (plus I wouldn't have room in my car to bring it home anyway). Amy purchased one of the vintage crates in the left photo to use as storage on her office desk.


Does this little floral tray look familiar in the lower right photo? I picked up one just like it for $3.00 from Goodeals and it now sits on my nightstand as a sort of catchall. I didn't note how much they were going for in comparison.


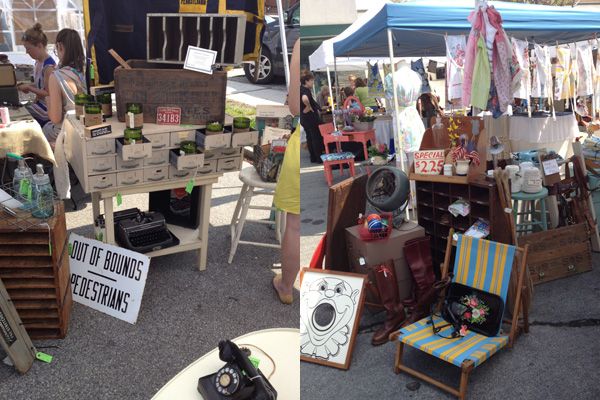
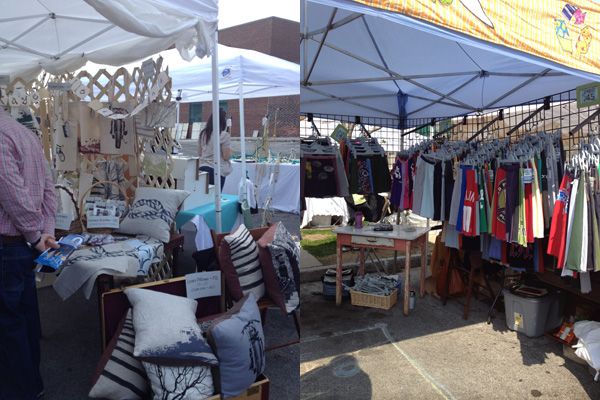
There were some great handmade textiles and screen printed pillows. The skirts in the lower right photo were made from old t-shirts. 


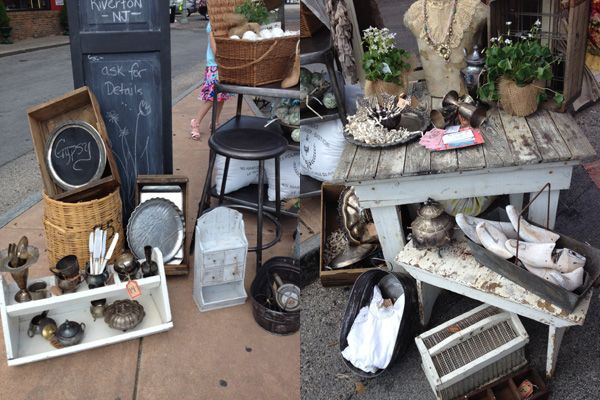
I loved the day of the week chalkboard, but we have absolutely no room for it in our house. It would be great in a kitchen as a dinner planner for the family or a chore schedule for kids.


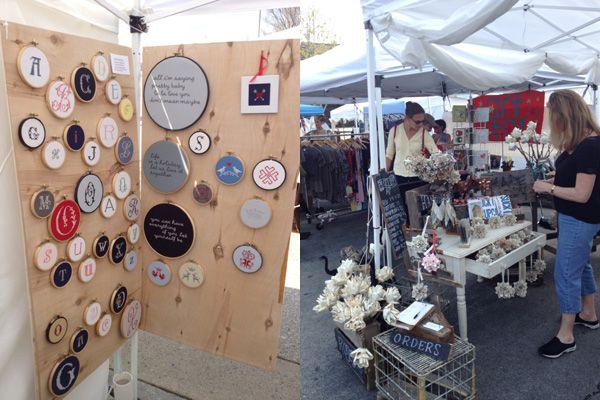
While I was mostly just browsing for ideas and looking for some inspiration for the guest room, I did purchase one small letterpress greeting card that I plan to frame and add to our new gallery wall in the living room.

Now that the weather is getting nicer I'm ready to hit up some great outdoor markets and yard sales. Anyone suggest any good flea markets in the DE/PA area?

18 April 2012

Pallet Paint DONE


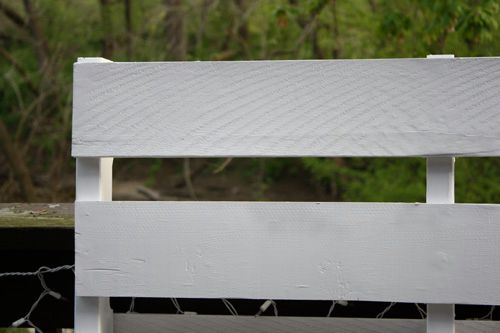
It look much longer than anticipated, but the pallet is finally, 100% finished being painted. It took so long due to a number of things, both within and out of my control. Two weekends in a row of rainy, damp weather didn't help since the pallet needed to be worked on outside on our deck. The pallet was also a lot more prep work than anticipated. I did several rounds of sand, spackle, sand, spackle, prime, spackle, sand before I was ready for the real paint to go on. While I didn't mind a few of cracks and minor flaws, I wanted to make sure to fill in any large gaps, cracks or holes in the wood.

Even when it was finally time to paint, I had to alternate between spray paint and painting by hand to get between and underneath all the wood panels. It was quite a chore. It will be some time before I'm ready to prime and paint another pallet! Luckily my next pallet will be staying as is.  


It's not perfect, but I never expected (or necessarily) wanted it to be perfect.


I bought these great hooks from Home Depot. The look almost identical to the ones in my inspiration photo, except I opted for a different metal finish. These ones are more of an oil rubbed bronze, whereas the ones in my inspiration photo are brushed nickel.


Of course the next step is hanging it up on the wall. We've been going back and forth a little on where exactly to hang the pallet. There are two possible spots: on the left side of the wall right after where the door opens, or on the opposite wall in place of the dresser. If the latter is the case, we may move the dresser into the closet or try to find another spot for it. Because of the size and layout of the room, we are pretty limited in our furniture placement. We also need to plan out exactly how we are going to securly install the pallet so that we can properly use the hooks and hang things from them.

In the meantime I am still planning out the rest of the room, I am on the hunt for some good light fixtures, a solid mirror, window treatments, and a few more gold frames for the wall.   

16 April 2012

The Ol' Switcheroo


I've mentioned a dozen times how bad we need a rug for the dining room. Ever since we moved in (back in 2008!) we've had just a solid wood floor with no rug. We've even done a furniture swap, and complete repaint, but still no rug. Luckily we rarely use our dining room so the floor hasn't taken too much of a beating over the years. We pretty much use the room when we have company over and need a large table to host the food. I think we've eaten at the dining room table a total of maybe 4 times ever, so I never really had a big motivator to go out and get something. Plus I couldn't decide what color and style to go with in that room.


We've had this Anthropologie Coqo Floral Rug in our living room since we had our hardwood installed a year ago. While I love the rug, I have to admit it's not easy to maintain. With two shedding animals laying on it all day he rug needs to constantly be vaccuumed because Lucy plays on it. With the raised threading, vaccuuming to the point of actually being clean is a pain and we needed something that was going to be easier to clean. Plus the red threading has been slowly coming apart with each vaccuum and I end up 'trimming' the rug on a weekly basis.

While recently shopping at Ikea, I came across a rug that I've seen there a dozen times that has always caught my eye. The great, simple gray rug with a white floral design.


The Gislev rug is only $19.99. It's a great looking rug and a decent size (4'x6'), but I was always a little nervous because of the price. Would it fall apart easily? Is the material not soft? Why does it only cost $19.99? I figured no better way to find out than to just buy the rug and give it a try.

We gave the Coqo rug one final vaccuum and moved it out to make room for the Gislev rug. I was so excited with the change that I grabbed my camera right away to snap some shots. Here is how the room looks today:


As much as I love the Anthro rug, I have to admit this one looks so much better in the living room. I'm nto sure if it's the fact that it ties it so well with my new pillows, or that I just needed a change, but I love it.

You can see from the other angle how well this rug flows with the other textiles.


From this angle you can also get a sneak peak at the new gallery wall I'm working on for the living room. I've swapped out the dark frames for light, brighter, white ones. I'm also getting rid of all but one wedding picture in exchange for some more 'family' oriented photos and other fun prints. I'm still playing around with the layout, but more on that in another post.

The Anthropologie rug found its new home in the dining room.


I have to admit I'm kind of loving how it looks. The dining room still needs some work, but this pop of color works really well with the walls, furtniture and floor. Another good thing is that being in a room that gets little to no traffic, the rug will be much easier to keep clean and will be less likely to fall apart by the time it reaches its second birthday.

I'm glad to finally have a rug on the dining room. The room actually feels warmer and looks so much more finished now.


Have you done a quick change or swap lately that improved your room(s)?

12 April 2012

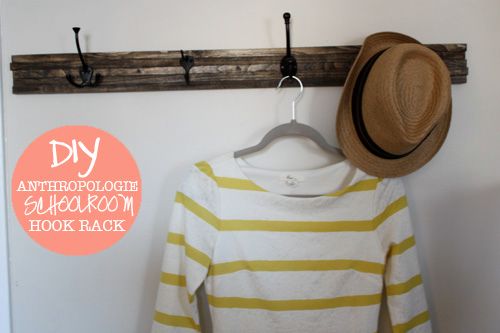
DIY Anthro Schoolroom Hook Rack


Supplies used:
- 5 strips of 5/8"x36" hardwood square @ $2.14 = $10.70
- 4 mix and match hooks ($2.98, $2.98, $3.29, $4. 49) = $13.74
- wood stain - $4.78
- wood stain brush - $0 (already owned)
- wood glue - $0 (already owned)
- screws - $0 (already owned)
- drill
- screwdriver


TOTAL: $29.22


What I love most about the Anthropologie version is the imperfections. I'm a big fan of rustic, rough wood and natural metals. I initially was going to use a solid strip of wood pulled from a second, more weathered pallet I have, but decided that I wanted it too look as close to the Anthropologie version as possible and decided to do 5 small strips of hardwood square.


To start, I gave the wood strips a little love with my sanding block. Some of the edges were a little rough and I wanted to start with a smooth surface for staining. 


Once sanded smooth, the strips were ready to stain. I stain I chose was 'Special Walnut,' which is a darker stain than on the Anthropologie rack, but better matched the furniture and style of our bedroom. I learned my lesson this time and used rubber gloves to stain! No more stained, oily hands. I did several coats to get the desired color.


Once the stain set, I used wood glue as a base to hold the pieces together initially. Since the wood strips aren't perfectly straight, I had to try a few variations to get them to lie as flat against each other as possible. I glued two pieces together first and secured with some tape until it dried. I then added another piece, and so on. It would have been better to use some sort of clamp rather than the tape because I still had a few small gaps after the glue dried. Unfortunately I didn't have any clamps to use.


Since wood glue wouldn't be enough to keep the rack from falling apart with any weight, we needed to add some screws vertically through the strips to hold them together. This is where my dad helped me out. We selected screws that were long enough to go through at lease three of the strips and alternated three screws going down and three going up. Because the wood strips were less than an inch thick, we made sure that a small pilot hole was drilled first to avoid the wood splitting when adding the screws. We used the drill to screw in most of the screw, then used a screwdriver and did the last few turns by hand, again to lessen the chances of the wood splitting with the power of the drill.


Tip: After drilling the pilot hole with the small drill bit, we took a larger drill bit (the diameter of the head of the screw) and drilled a small indentation in the wood. We did this so when the screw goes into the wood, it will lie flush and not stick out.


As you can see, the screw is barely noticeable.


Next, we needed to measure out where each hook was going. I decided to use 4 hooks of varying styles/sizes like the original rack. Two smaller hooks of the same type and two larger hooks of different styles. I alternated the hooks accordingly: large hook - small hook - large hook - small hook. We marked where the holes were and attached the hooks. Note: When doing this, you need to make sure you aren't attaching the hooks where one of the veritcal screws are in the wood or they will end up running into each other.

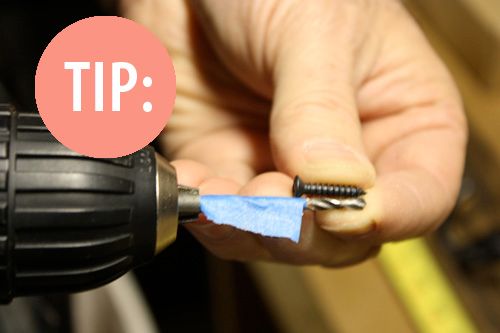
TIP: We had to use different screws than the ones that came with the hooks because some of them were so long they would have gone through the 5/8" strip and out the back. Luckily my dad had a stash of screws and we just enough in the perfect length. In order to make sure that the pilot hole didn't go through the back of the wood strip , my dad taped off the drill bit at the end of the length of the screw. That way he knew once he reached the tape, to stop drilling. 

The final step was hanging the hook rack. It was pretty crucial that we were able to screw the rack into at least two studs in the wall since I planned to hang things with a decent amount of weight. Depending how much junk I toss in it on a given day, my purse can be fairly heavy. We used 5 screws total to attach the rack to the wall, with the first and fourth screws each secured into a stud. Again, you need to be aware of where the vertical screws are so that you don't try to drill the same spot. We used the same method of drilling the pilot holes first, and hand screwing the screws in to avoid the wood splitting.


As you can see, I intentionallly staggered the wood strips so the edges wouldn't be perfectly straight. 


Here's a view from across the room so you can see how it looks in proportion to the rest of the wall. I haven't showed you all any recent pictures of the master bedroom. I'm doing a few finishing touches on the bath (including adding some much needed wall art), and have been making a few small changes in the bedroom (like my terrarium project). Bye-bye wall shelf above the bed. Hello big white frame. I can't wait to show you all how it looks once I'm finished.

For now, I'm enjoying my Anthro inspired hook rack made for a third of the price!