
In order to do this project you need:
- canvas
- acrylic paint
- sponge brush
- 8.5x11" label paper
- basics: ruler, pencil, scissors
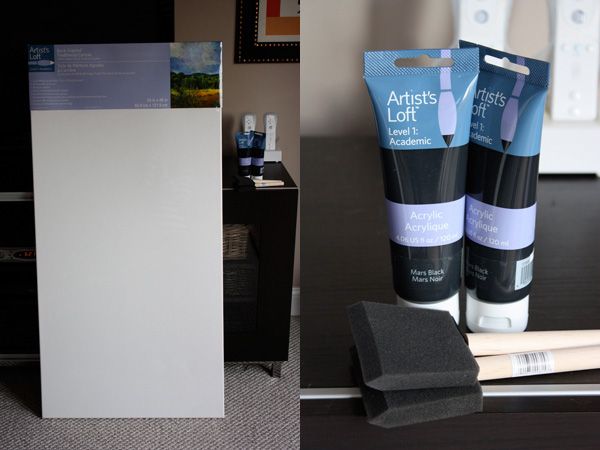
I purchased my supplies from Michaels. The canvas was $29.99, plus I had a 40% off coupon = $18.00. The acrylic paints were on sale from $3.99 to $1.99. I purchased two, although I ended up only needing one tube. I also grabbed two brushes for $.79 each (but again only used one). I already owned the label paper from a previous project so that didn't cost me anything.
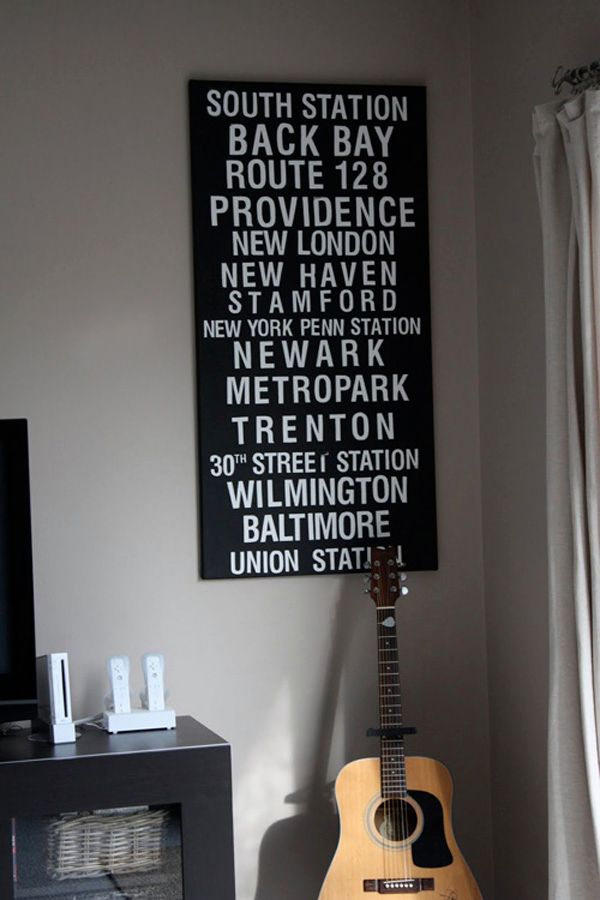
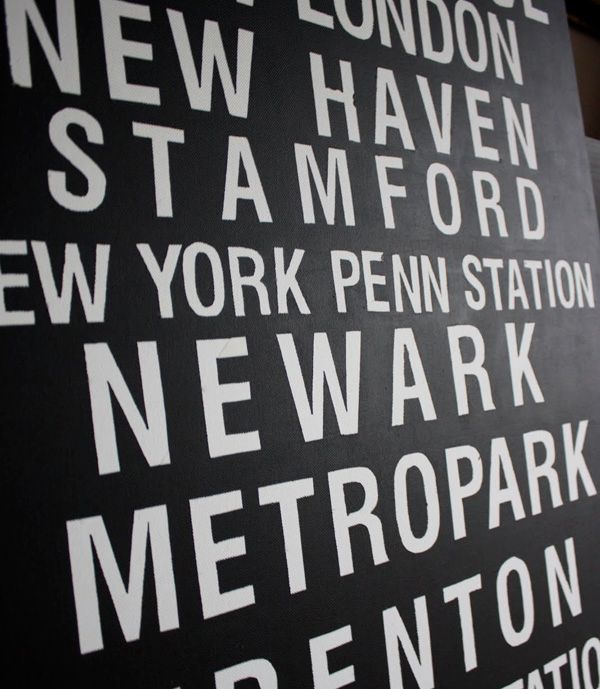
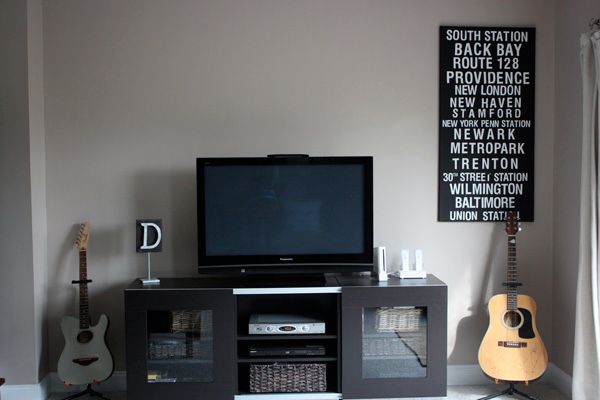
As I mentioned before, I let Jordan choose the train stops for the sign. Since he's such a huge Red Sox fan and we've taken a number of trips to Boston over the years, he chose the Region Rail like that runs from Union Station in DC to South Station in Boston.
I played around with my layout on Photoshop. I knew I wanted to mix and match the sizes of each line, depending on the length and number of words. Once I was satisfied with how everything looked, I took note of the fonts from each line and moved everything into Microsoft Word so I could print sheets of letters on white label paper. (Font I used was "Milford Condensed Bold.")
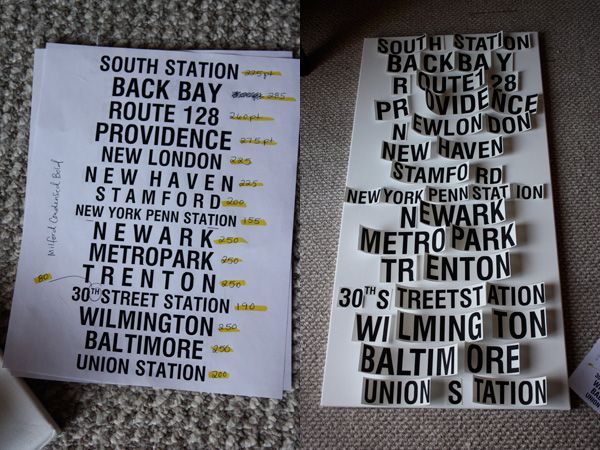
I played around with my layout to make sure things fit how I wanted. Once I was satisfied, I proceeded to cut out each letter. I'm quickly learning that I have a tendency to take on projects that contain a lot of tedious detailed work like this. But I honestly don't mind plopping on the couch and cutting out letters or fabric circles while I watch a movie.
Using a level I made guide lines for each train stop and began the long peel and stick process. Even with the pencil lines I had a hard time keeping all of the letters straight.
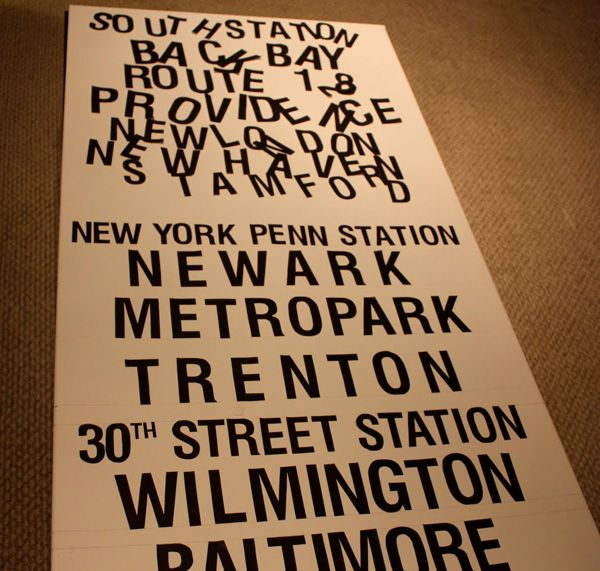
Since I used a basic sticky paper that would be easy to peel back off, we placed the canvas face down over night and put some heavy books on the back to secure the letters for painting.

After the letters set overnight, it was time to paint the canvas. One tube and two coats of black acrylic paint did the trick.
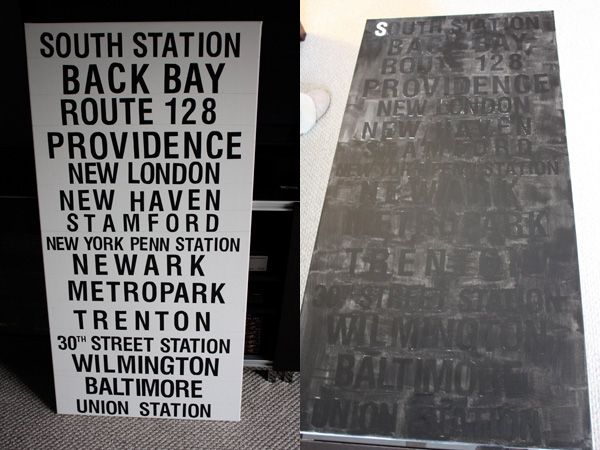
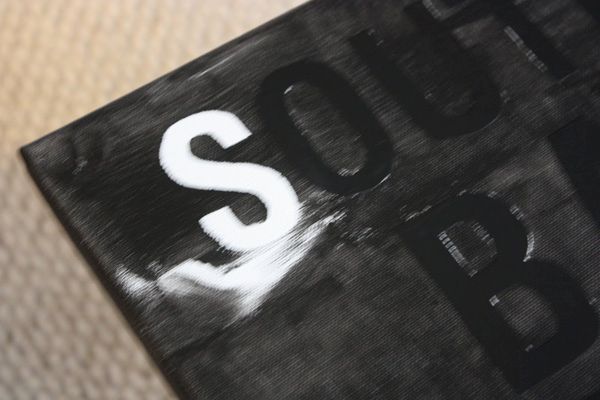
I got a little nervous when my first paint stroke resulted in a letter peeling off. I had to switch my paint technique and go very slowly in order to avoid this happening on the rest of the sign.
After a few hours of drying, the last step was peeling off the letters and hanging the sign.
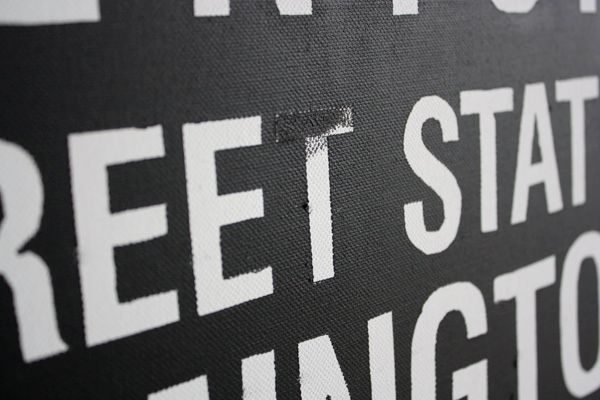
Below you can see a part of the sign where the paint bled underneath the letter decal. Jordan and I both agreed we liked the imperfections on the sign.
In the end, I spent half as much money to create this sign as the Homegoods version I saw. I spent about $26 and didn't even use all the supplies I purchased. I'm even happier with my sign than the store-bought version. Because Jordan chose the train stops that represented our trips to Boston, this version has more of a sentimental value to us.
EDIT: I made a second sign. Check it out here.
I have been searching for a tutorial and thinking about creating my own subway inspired sign for our dining area! Thanks for sharing!
ReplyDeleteYou are welcome! It was really easy and actually a lot of fun to do! Good luck :) Please send pictures if you do one yourself.
ReplyDeleteGreat howto! I love the sign, and now I know what to do this summer. I linked you on my blog. I think others will be as inspired as myself.
ReplyDeleteAuf wiedersehen from germany
thegoodguy
Thank you! It was a really fun and easy project to do. I'm already thinking about my next sign to make. Good luck!
ReplyDeleteI think this looks great! What kind of paper did you use to print on? Can't wait to make my own!
ReplyDeleteI used regular Avery brand sheets of label paper. You can get them at any office supply store. It was moretime consuming because I had to individually cut out each letter. You could also purchase letters at a craft store but I wanted to use a specific font and varying sizes for each line.
ReplyDeletebeen looking for a DIY way for these cool boards! love your blog!
ReplyDeleteSo excited I found this tutorial. All the other ones I've found are so complicated, but this looks relatively simple. Too bad it's Christmas day or I'd go to Michael's right now and buy all the supplies!
ReplyDeleteI'm doing one of these for my fiance this weekend. I'm so excited to see if it looks as great as yours. Thanks for the easy tutorial!
ReplyDeleteI love this! I want to do this in "art jamming session" (we book a studio & paint together). Do you think I can just put the words on and paint after an hour? would the words peel off?
ReplyDeleteI will do it on a pretty small canva, just 24cm x 33cm. Thanks!
Probably, if you have the words precut by then. The longest part for me was cutting each letter out. You also might want to let the paint dry as much as possible before peeling the letters off.
ReplyDeleteLove the art jam session idea!!
Thanks for posting! Great tutorial! :)
ReplyDeleteThanks. I'm glad you like it!
DeleteJessica -- Your sign looks great. Quick question -- what is "label paper" and where do you get it? Do you have a recommended brand? I'm gonna do a similar canvas this week and I'd love to use your technique.
ReplyDeleteThanks a bunch!
Thank you! I use Avery brand label paper. You can purchase it from any office supply company like Staples. They sell different sized labels. I used 8.5x11" full sheet labels for mine and printed on them as if they were regular computer paper and cut the letters out. Good luck!
DeleteThanks! I'll try and remember to post a link back here when I finish my artwork/ post it online. :)
DeleteI can't wait to give this a go! Can I ask, what size is your canvas? It looks perfect for my living room!
ReplyDelete2 feet wide by 4 feet tall. :)
DeleteJess, this is great! I'm trying to do something similar with our wedding song lyrics but I thought it was going to be too difficult! Maybe I'll try it this weekend!
ReplyDeleteYou should do it! I's super easy and you can just sit in front of the TV or put on some music and get to work.
Delete