Showing posts with label wall art. Show all posts

09 September 2014

Laundry Room Art - Opinions Wanted!

When I first became a homeowner, I knew nothing about art and wall decor. Over the years I've decorated our house with a lot of DIY type art (painted canvases, painted wood, framed napkins, etc) as well as personal photos, but never felt comfortable enough to purchase anything. I've recently begun to explore different artists, photographers, and prints and am slowly starting to add some legitimate art to our house.   

As I mentioned in my last laundry room post, I ordered two prints from The Aestate's Beverly Collection. 
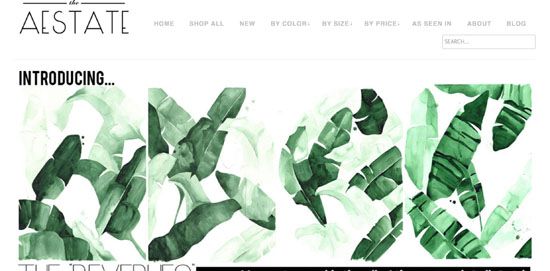

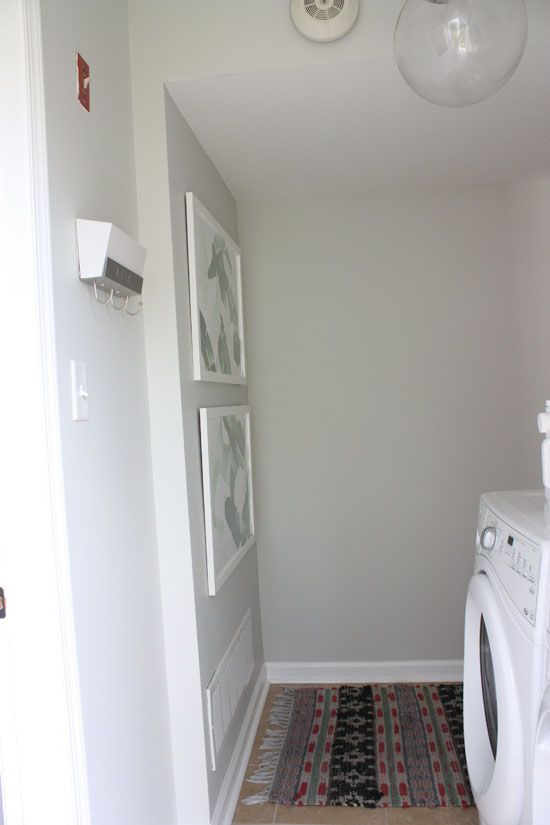
I also purchased two 20"x30" frames from Amazon. I chose white because I didn't want the frame to take away from the print and wanted the green to really stand out. I hung them on the laundry room wall over the weekend. 
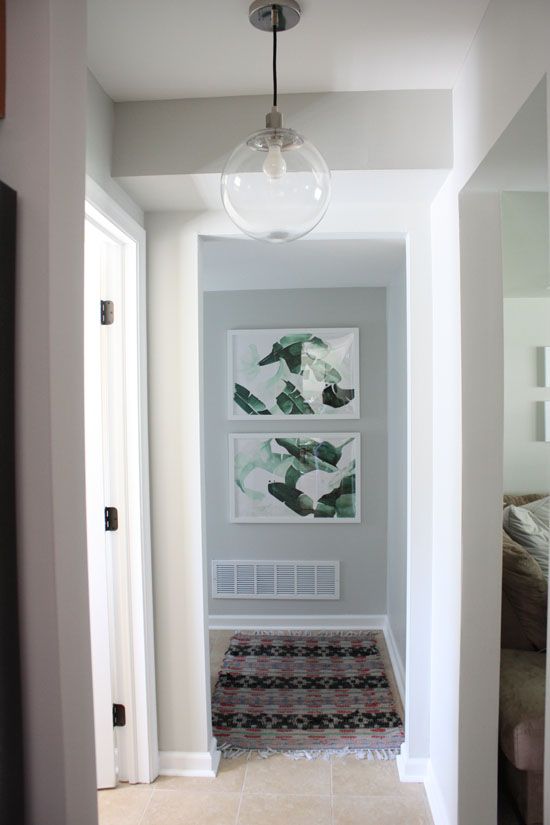

This is the view from our kitchen. The family room is to the right and powder room to the left. 

My reason for hanging these on this wall was that I wanted something attractive that could be seen from the kitchen when we have company. While it might makes the most sense to use all the wall space in a small laundry room for storage, it didn't want our guests to see a wall of cleaning supplies or laundry equipment when they looked down the hall. I'm sort of hiding the fact that the laundry room is right there. 

I briefly considered putting a door at the entrance of the laundry room since it can be a bit noisy when you're trying to watch TV with the machines running. We nixed that idea for two reasons. First, I didn't want to lose any natural light coming in from the laundry room door (I even thought about a glass door for that reason). The second reason we decided against a door is the vent you see under the prints. If we blocked off the room we would also block one of the main sources of air conditioning and heat from getting to our first floor. 

I also thought about hanging a gallery wall here, but I realized that the photos would be so small it would force our guests to have to walk down the hall into the laundry room to even look at them. With bigger prints they can easily be seen from the kitchen or even when passing through the hall to the powder room. 
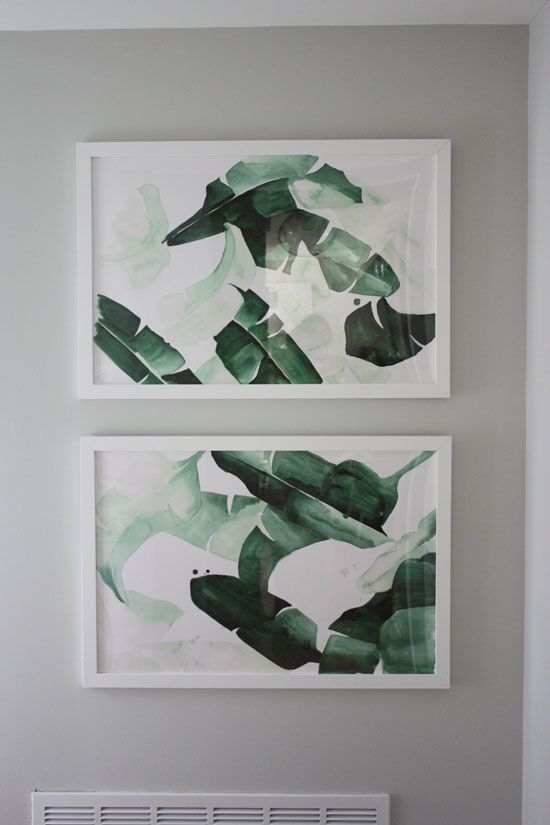

Now that these are hung, I'll admit I'm not 100% sure I love it. What do you all think? Is this too much for a laundry room? Do you like the view from the kitchen? I may just be overthinking things as I'm usually never 100% sold on anything.
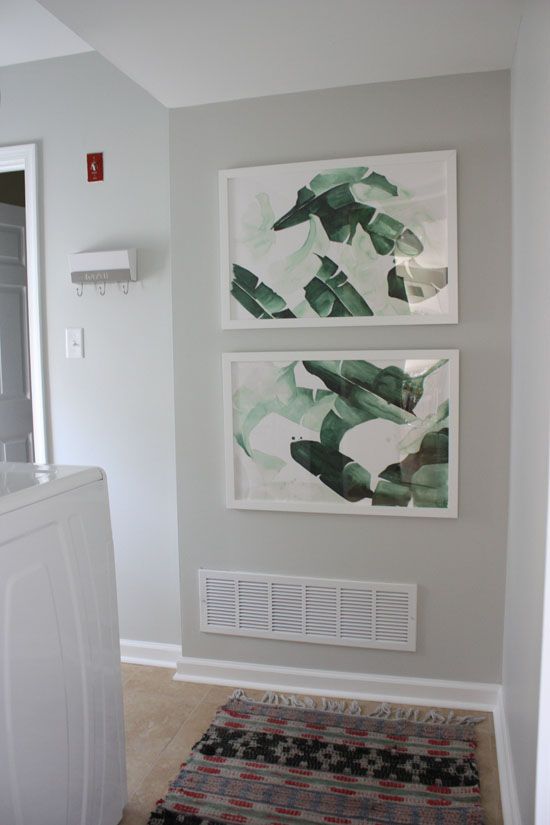

It's a little difficult to get photos of this tiny room with just natural light, especially considering the overcast days we've been having. It doesn't look this dark in person.

I do love how the green looks against our pale gray walls and how it complements the green in the rug. 
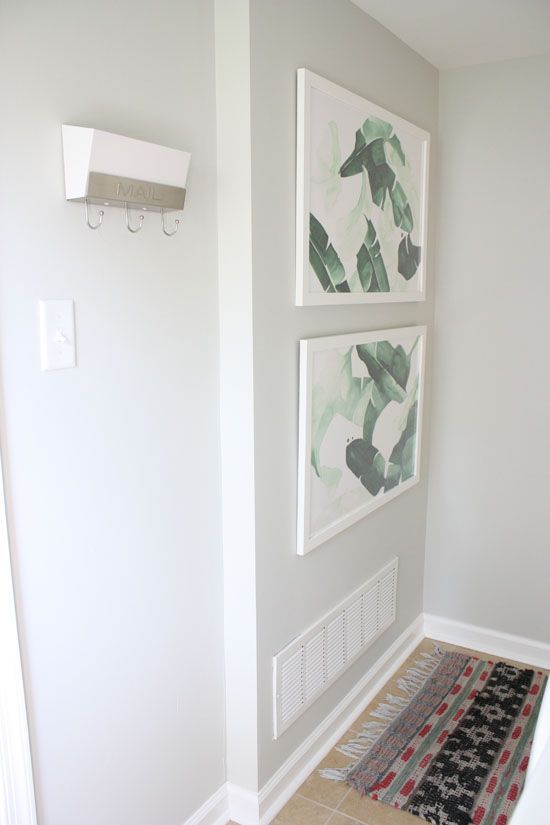

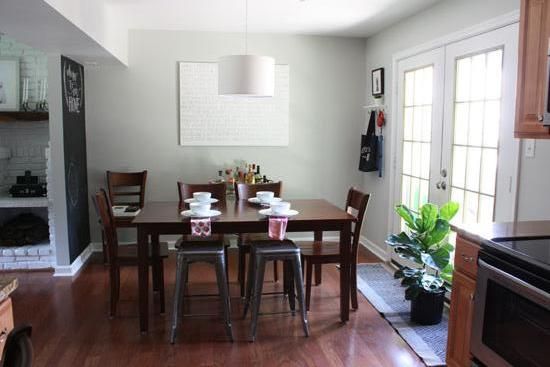
We don't have many other options where these prints could go and I would prefer to keep them downstairs where people can see. My only other thought was possibly side by side on the wall behind our kitchen table in place of the lyric canvas. It would certainly add some color to our kitchen, but I don't know if the wall is too large for them to hang. 

Luckily, the fun thing about art is that it can be moved around whenever you want. These frames they are hung by a simple picture hanger, meaning the wall is a quick and simple repair should we choose to move them.

The print will remain for a while until I decide if I'm sold on that location, but don't be surprised if you see them moving around the house in a few months!

18 November 2012

Now Open: Lucy + James Etsy Shop!


I am beyond thrilled to announce my Etsy shop, Lucy + James is officially open. :)
It has taken many late nights, long hours and tired hands, but it's finally here.

This shop offers original, hand painted art done by me. 
Pre-made and custom orders are both available. 

I have 6 completed pieces for sale along with options for custom pieces in both 12x12 and 22x28. 
I am also working on more 12x12 that will be added to the shop hopefully within the next week or two.


Please take a moment and stop by for a visit. 
I hope you all enjoy!

30 October 2012

Homemade Fingerpaint = Best DIY Art I Own


I'm not even sure why, but long before I was even had Lucy, one thing I've always wanted as a mom was to have frames all over my walls proudly displaying my child's artwork. That has been a dream of mine for a while.  The idea of it just seems so sentimental and sweet and I love the idea of such one of a kind, personal art. Plus I not so secretly hope my children enjoy doing arts and crafts as much as I do. 

I also want Lucy to look back and remember me as a fun mom. I hope that when she grows up she can say her childhood was never boring. Of course I'm dying for her to have a creative artsy side, but I would never force it on her. Lucy is now at the age when I can really start to introduce little activities to her and take her to Children's Museums and other interactive places and I want to take full advantage of that. 

I can honestly say I had a fun mom. My mom is very creative and has an artsy side. After all, her father was an artist. I remember she used to buy these huge rolls of paper and every year or so she would trace the outline of each of us on the paper. We would finish the  drawing of ourselves by drawing and filling in the clothes, hair, etc. It was fun to pull out the old ones and see how we had grown. One year for Dr. Seuss' birthday, my mom made us green eggs and ham. I'm pretty sure we all looked at her like she was crazy and no one ate any, but still the idea was fun and genuine. My mom also used to make us homemade 'happy meals' with her own chicken nuggets, fries, and brown paper bags. Some days she would give us a newspaper article and assign everyone a letter. Our task was to find that letter and circle it every time it appeared throughout the article. Looking back now I'm sure that last one was just my mom trying to give herself 15 minutes to get dinner started. Nonetheless I still remember it and we found fun in the activity. 

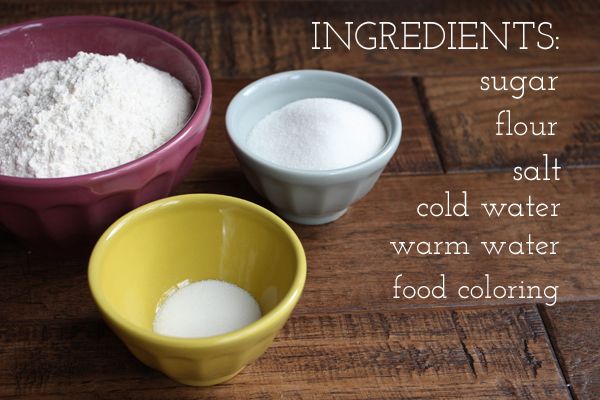
I came across the idea of making homemade edible finger paint on Meggan's website, The Birth of a Mother. It looked like such a fun idea and a great way to spend an afternoon with Lucy. The recipe I used was from this website I found by searching on Pinterest. Love Pinterest. How many times have I praised that website?


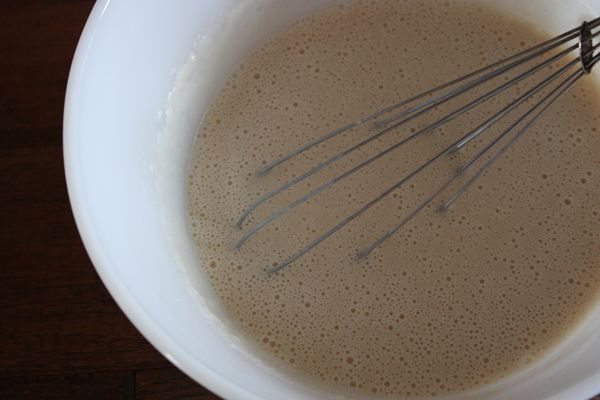
I followed the recipe on the website, but needed to adapt it a bit when I found my mixture to be super watery and too runny to stick to paper. I tossed almost another full cup of flour into the mixture until it was the texture I wanted. Looking back I would cut the entire recipe in half because I had a lot of leftover paint in the end.


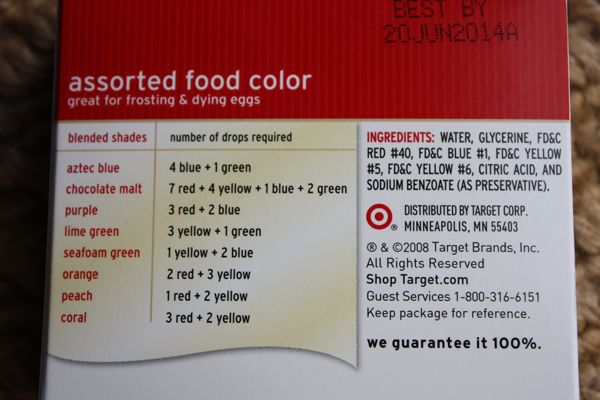
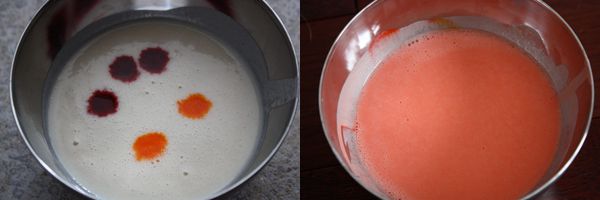
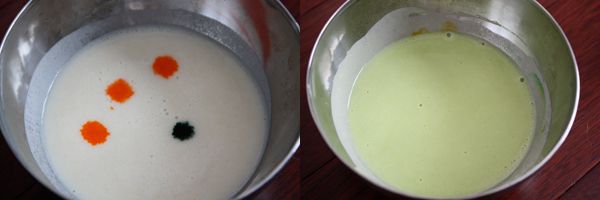
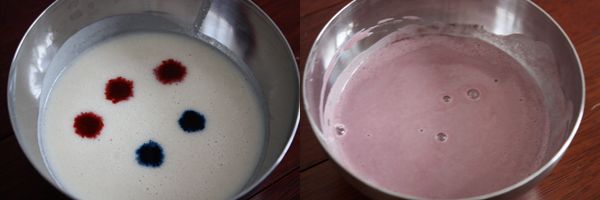
The food coloring I purchased was just a generic Target brand box I grabbed while stocking up for the hurricane. What I didn't realize until I got home was that the box had little recipes on the back to make your own custom colors. I knew from the beginning that I didn't really want the traditional red, blue, yellow, green color scheme and planned to attempt creating my own colors anyway. I thought this was a great idea. 


I opted for coral, lime green, purple and aztec blue.


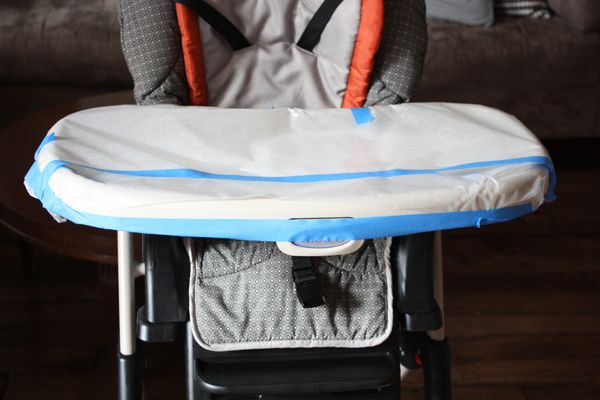
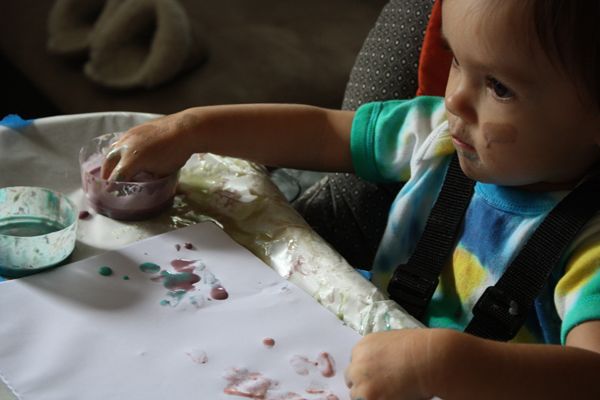
One of the smartest things I did for this project was covering Lucy's highchair tray with parchment paper. As she painted, pools of paint built up all over the tray and it was so easy to just grab all the paper at once and toss it when she was finished. I didn't have to clean an inch of the trays. Now the seat straps were another story. I'm still scraping dried up paint out of them. Next time I'll wrap them in parchment paper, too.


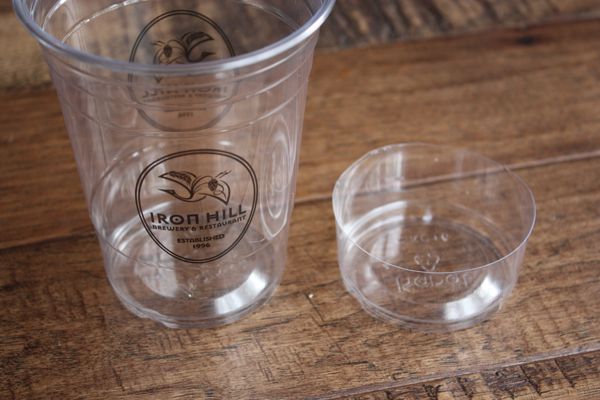
I made the paint while Lucy was napping and decided to transfer smaller portions into mini cups for her to use. Knowing Lucy and her tendency to try to 'dump' things on her highchair, I wanted to lose a little paint as possible if she started the craft with a good spill. I took some plastic cups we already had at home and simply cut them down to size.


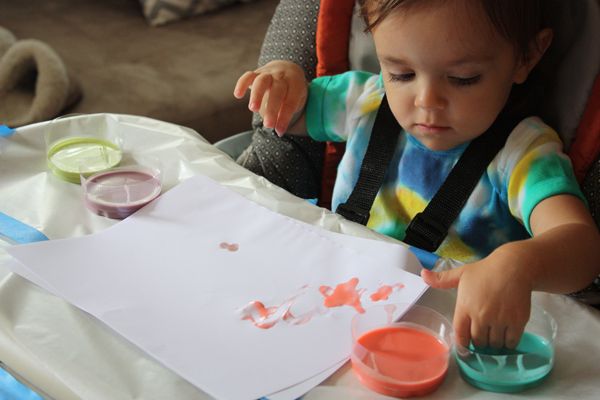
Once Lucy woke up and had a little power snack of cheese and strawberries, we were ready to paint! I was actually surprised that she dove right into the paint and got to work.


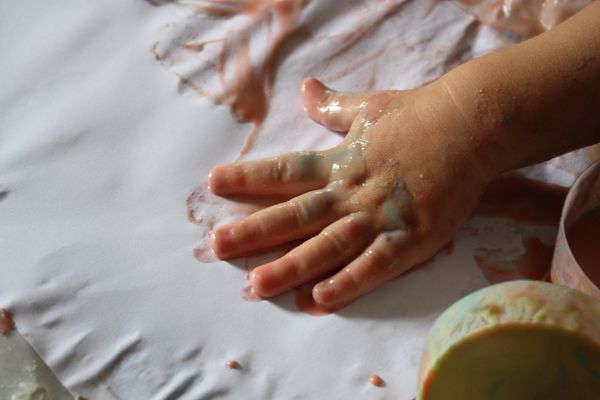
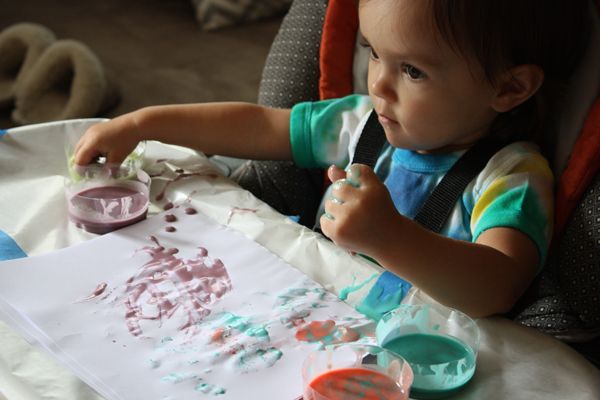
Lucy had a few different techniques. One was dabbing the paper with the tip of her finger, another was smearing the paint with her entire hand. I pretty much let her play and do what she wanted with the paint, even tasting it a little it as she went along. 


One of her favorite techniques (although it wasn't necessarily a painting technique) was to squeeze the paint in the palms of her hands. I think she enjoyed the texture since it was a little thicker than traditional paint.


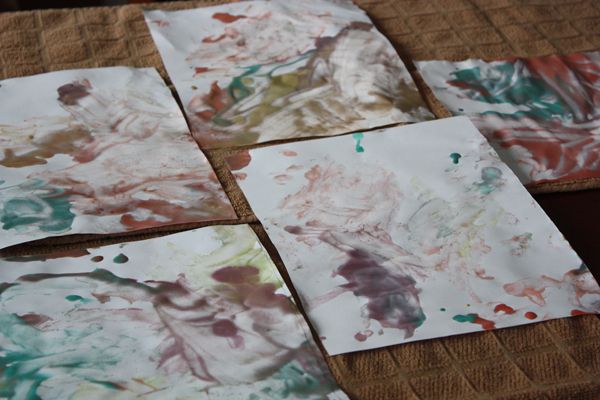
In the end Lucy made 8 pieces of art. I just kept swapping out paper as each filled up until she became bored with it (aka was only interested in eating the paint.)  Because of the texture of the paint, I set towels out and put the art on the towels to dry overnight. The pages were a little heavy while they were wet, but once dry were much lighter and easier to work with. 

I love every single one of them. 


And in case you were wondering how Lucy fared..


Honestly even cleaning her up wasn't that bad. The good thing about the ingredients of the paint is that when it started to dry, it formed sort of a paste and wasn't drippy. I didn't have to worry about smearing the paint on myself and simply carried her right up to the bathroom and stuck her in the tub.

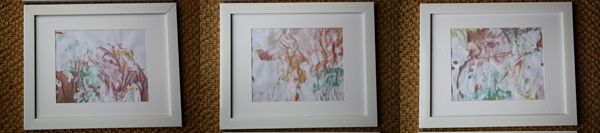
I already purchased frames for three of my favorite pieces. Still debating where to hang them, but thinking in the dining room.


I think I would say this first project was a success. I knew it could go either way when I planned it. If it was a failure we would move on and wait until she was a little older and try again. Since it was a success, well... everyone might be getting finger paint art for Christmas this year.

19 September 2012

More Framed Napkin Fun


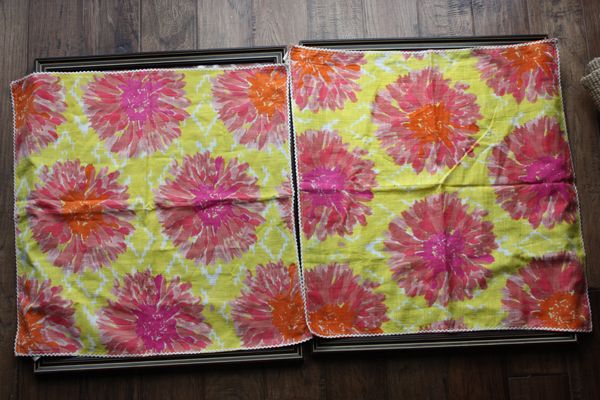
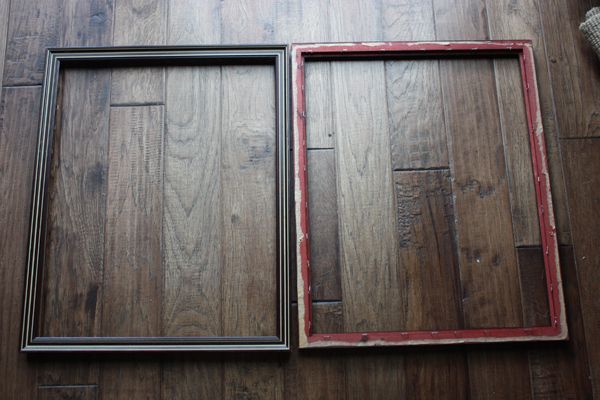
Remember last week when I shared my thrift adventures with you, including how I scored these two frames? You might also remember this project where I took napkins I had found in the Anthropologie clearance room and tossed them in some Ikea frames to hang above our couch. 

Recently I decided to repeat that project, except using different colored napkins and thrifted frames instead of pricier Ikea ones. I saw these pink, orange and yellow napkins also in the Anthro clearance room - pretty much identical to the other ones, but with a different set of colors. I resisted buying them a few times, but eventually allowed myself to get them after I decided they would be a great addition to Lucy's room.


I sort of blindly chose the frames at the thrift store and held my breath when I brought them home put the napkins against them and they fit almost exactly the width of the glass. Whew! I don't know how well Goodeal does returns, so I'm glad I didn't need to try.

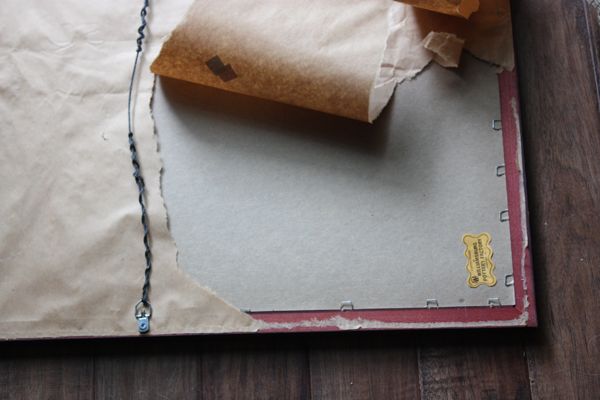
Obviously the frames needed an upgrade before putting the napkins in them, so I got to work. I'll admit I was a little nervous as to what I would find when I peeled off the paper on the back of the frames. I've never tried to use frames that have been professionally assembled and was worried that I wouldn't be able to put it back together again. 


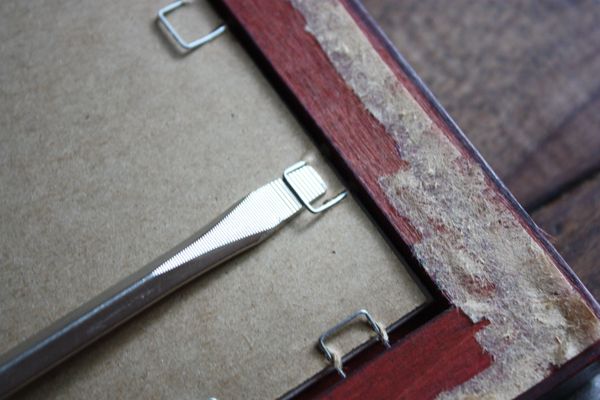
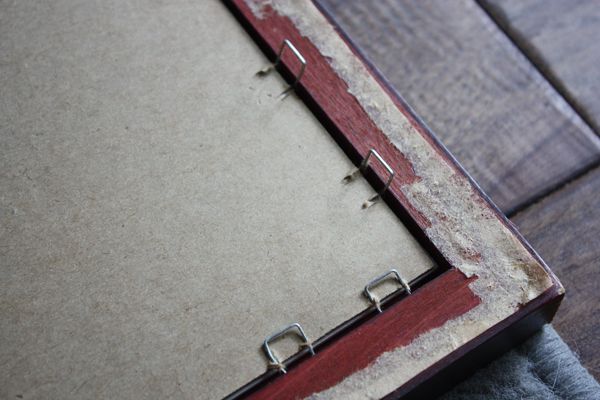
I was relieved when I saw it was simple staples that I knew how to handle. 


For those of you who may not know (but I'm sure you all do), a simple flat head screwdriver is the best way to lift up these staples so you can remove your print and matt. Plus, it saves your manicure from trying to lift push them all back by hand. Verrrry important.


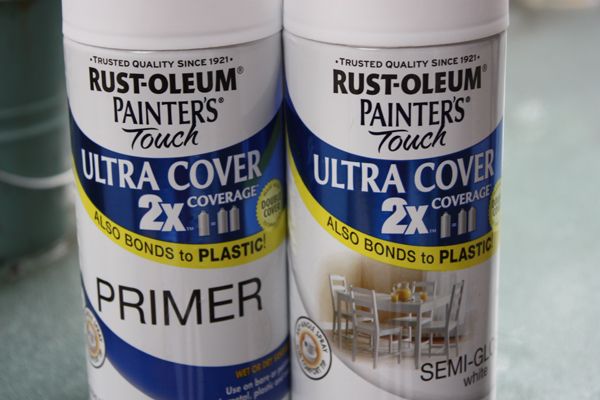
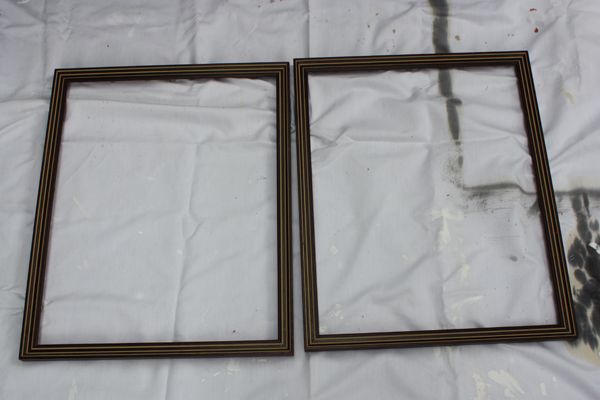
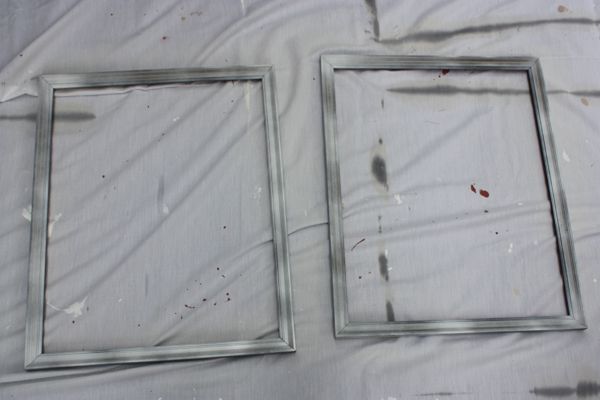
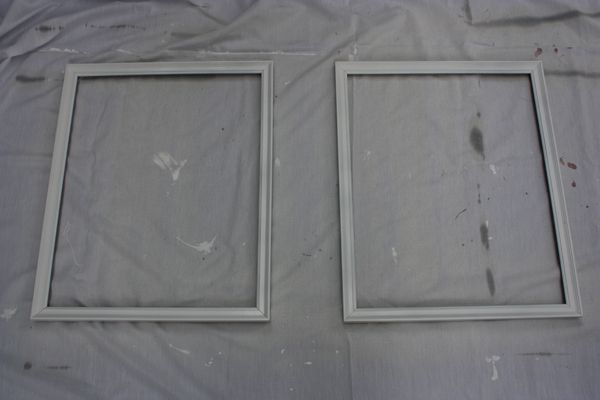
Luckily the finish of the frames was rough enough that I could skip sanding and get right to spray painting. Two coats of primer and two coats of semi-glossy white paint later, the frames were good as new and ready for some pretty fabric to fill them.


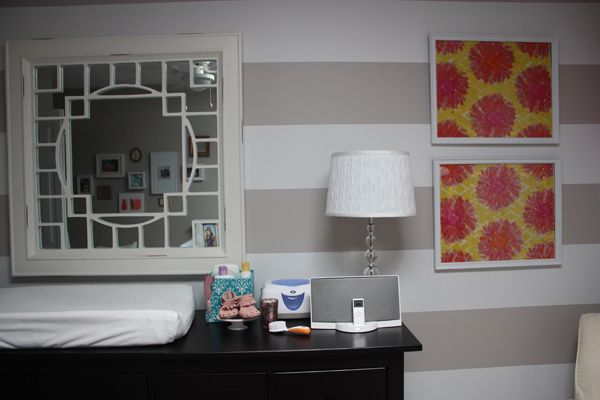
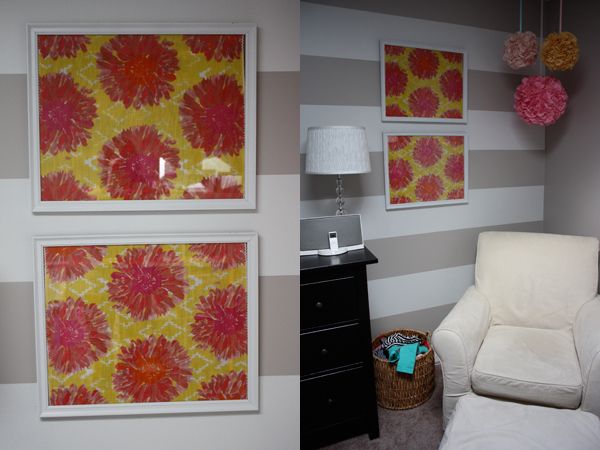
One dried, I stuck the napkins inside and hung them up on the striped wall in Lucy's room. 


I was careful to measure the wall and position the frames just right so that they lined up equally against the stripes on the walls. It would drive me nuts if there wasn't equal parts of the white stripes showing on the top and bottom of the frame. I know, I'm crazy like that.


They look pretty nice with the fabric pom poms above the chair, don't you think?

I have a few more touches to add to Lucy's room before I share with you all how I've updated her space to be a little more toddler-friendly. Until then, enjoy these pretty framed napkins to hold you over.


Don't forget about the Shabby Apple $50 giveaway going on now through Friday.
See details here.
As an added bonus, Shabby Apple is offering my readers 10% off any order for the next month when they use the code 'simplekindoflife10off'. It just keeps getting better, right?

20 June 2012

New Hallway Art

I've teased a few times on Instagram about this painting I had been working on. I started it a while ago but kept putting the painting on hold due to my tendency to tackle way too many projects at once. A few weeks ago I finally finished it and last night I finally got around to hanging it up.

This space between our guest bath and laundry room had been needing some love ever since I repainted the upstairs hallway (read about that here and here) back in February of 2011. Yes, that long! My original plan was to recreate the gallery wall that was already there using photos of our parents and grandparents on their wedding days, but scrapped that idea (I now plan to use those photos in the guest room). Once I started on this painting I instantly knew I wanted to hang it on this wall.


I was inspired by the geometric patterns and the arrow designs I had been seeing lately. There was no real plan in the beginning and the painting sort of just evolved on it's own as I was working on it. I know it looks a little busy, but I think it works considering the size of the canvas. I plan to recreate more pieces using different color combinations, different sized canvases, and different geometric patterns. Probably a little more toned down than I did for this one.


Either way I love this one and I'm pretty darn proud of it.


A shot from the master bedroom looking towards Lucy's nursery (look forward to some mini changes in this room, too). The painting really makes our upstairs hallway look much more finished. Even though many guests don't go upstairs (unless they are staying over), it's satisfying to me to be able to come up the steps and see this painting on the wall.


I chose a copper paint to paint the edges and 'frame' the painting. I'm not going to lie, this painting was a lot of work and took a lot of time to do. In all honestly, I really enjoy detailed (and somewhat time consuming) projects. I really love watching projects evolve with each piece completed, even if it takes several weeks to do. Call me crazy but if I see a long, drawn out, tedious project I'm likely to take it on. (See the subway sign and nursery pom pom projects if you don't believe me).


Here's a shot looking from another work in progress: the guest room.


Art makes me happy.

24 February 2012

How To: Chevron Painted Canvas

If you follow me on Pinterest, you may hove noticed a few months back that I pinned this bag from Etsy.


While the bag itself is great, the actual reason that I pinned this picture is that I love, love the chevron pattern and color scheme and thought it would be great to recreate on a canvas. I've been desperately trying to find solutions for all the empty wall space throughout our house. I'm not a fan of most art I see in places like Marshalls and don't have the wallet to purchase legit paintings. So my solution is to DIY my wall art.

To create this chevron canvas the supplies I used:

- Canvas - any size. (I used 12x12)
- Ruler and pencil
- Painter's or masking tape
- Paint colors of your choice
- Sponge or small paint brush


To get started, you need to divide your canvas by how thick you want your stripes to be. 
Since my canvas was 12x12 I opted to make 12 one inch squares across and vertically. 


I would suggest drawing your lines very lightly. I made the mistake of drawing mine a little too dark and needed to try and erase the lines once the painting was finished. 

Once your square are set, you can start drawing the chevron pattern. To do this, you simply draw a line, corner to corner, across the middle of your first square. Repeat this in the same direction for every square below going vertically. Draw a line in the opposite direction for both squares on either side.

If my directions are a little confusing, use the below picture as a reference.


After the chevron pattern has been drawn out, I cut several two inch strips of painters tape and put them along every other chevron line. I wanted the stripes between to remain white.


This was the most tedious part for me. Again, I'm seeing this trend where I choose these tedious ways to create fun art. First the pom poms that took hours to cut circles and glue, then the subway sign where each letter needed to be individually cut out. Now, I'm cutting 2 inch pieces of tape one by one and sticking dozens on a canvas. I think sometimes I like doing monotonous, detailed work that doesn't entail a ton of thought. Luckily this time I have a fairly small canvas to work with and it really didn't take a lot of time to do. 

The tricky part for me was that my painter's tape didn't want to stay down. I'm not sure if I would have had better luck had I used Frog or masking tape, but at the time I only had blue and it was crucial that the tape be only 1" thick. 


To solve this problem, I used the same trick I did when making my subway sign and needed to reinforce the letters to the canvas. I flipped the canvas over and used heavy cookbooks to weigh down the canvas against the painter's tape.


You can see in the above pictures that I also put a strip of tape on the back of the canvas to hold down all the ends of the tape that wrapped around from the front. 

Once the books were set I let them weigh down the canvas over night. If you don't want to wait until the next day, I would suggest at least waiting a few hours to make sure the tape is pressed firmly onto the canvas.


Once the tape is set, the fun can begin when you start to paint. I chose the same color pattern as the bag I found on Etsy, but obviously you can use any selection and order of colors you like.

I lucked out that I had almost all of the exact (or at least pretty darn close to) colors that were used in the inspiration photo. The only color that didn't match was the light tan, which I recreated with a taupey-grey paint I already owned mixed with a little bit of white. When painting between the stripes you want to be careful to avoid the paint bleeding under the tape. I chose to use more of a dabbing/blotting method to apply the paint, or at least the first coat. It took about three total coats to get the deep color I wanted.


Once the paint dries, you simply peel the tape and your canvas is good to go.
This blog wouldn't be 100% true if I didn't let you all know that once the tape was peeled my canvas wasn't perfect. There were a few spots where the paint bled through the tape (looking back, masking tape would have been a better option to use) and there were also still pencil marks since I made the mistake of drawing my lines a bit too dark. 

I simply used some white paint and filled in the spots between the chevron stripes.
I'm actually glad that I did this anyway because it helped make the white stripes between each color bolder and brighter than the white of the bare canvas.


For now, the canvas is resting on the ledge that is on the wall above our bed. I may end up relocating it. I love how the colors of the stripes match the black ledge and vintage gold mirror already above the bed.


Of course you don't have to just do this on canvas. You can use this chevron pattern on anything you want to paint: a wall or rug, or embellish something small like a mug or plain white dishes (decorative, of course).

Happy Friday and Happy Crafting!
Have any great DIY plans this weekend?