Showing posts with label holidays. Show all posts

01 April 2013

Easter Table


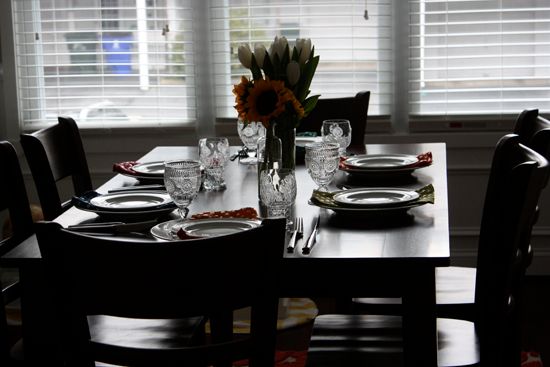
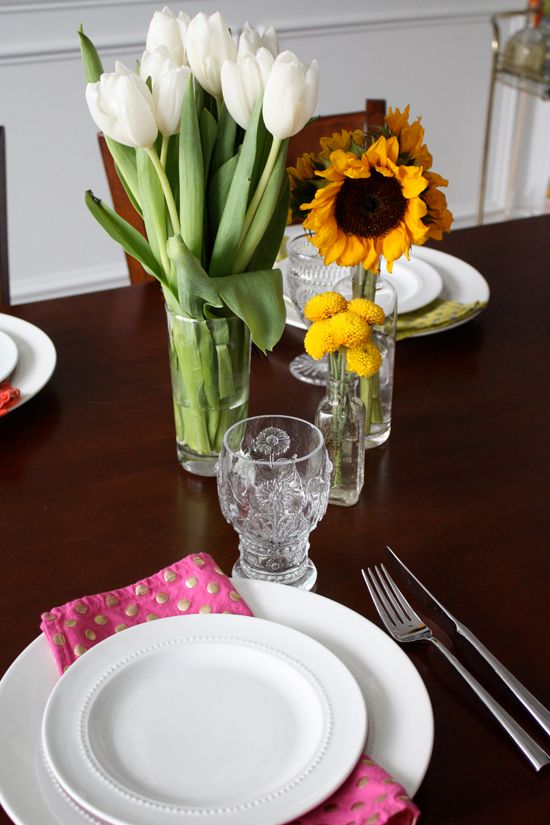
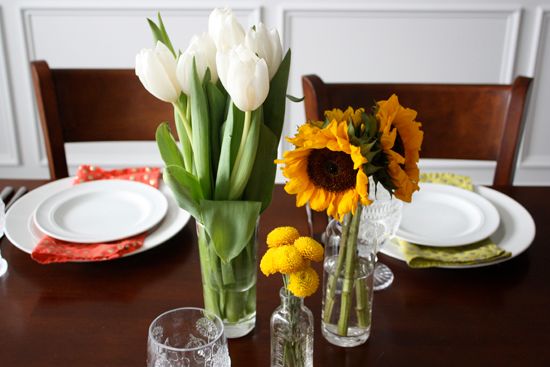
Hope you all had a Happy Easter. This Easter dinner was my first time hosting a family holiday. It was somewhat of a last minute thing, and technically my entire family wasn't there. Jordan had to work and one of my brothers spent the holiday with his girlfriend's family, plus we had no grandparents, aunts or uncles this year. So it was just my parents, one of my brothers, Lucy and myself. I think having a smaller group of our family made it a little easier to ease into my first holiday. In preparation I put together a somewhat impromptu table setting I thought I'd share.
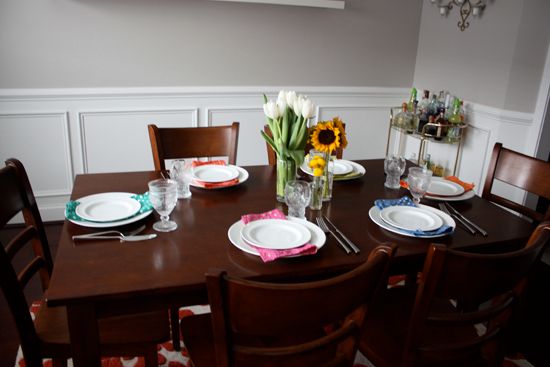

The dishes are Target. The silverware is Kate Spade from our wedding registry. The multi-color polka dot napkins were a recent score in the Anthropologie sale room.
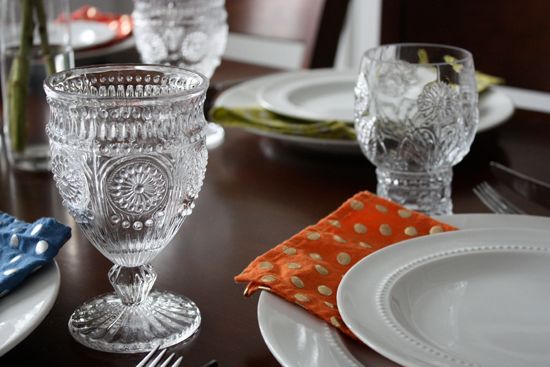

I mixed and matched Anthropologie and Pottery Barn glasses. I love the variety of colors on the table. 
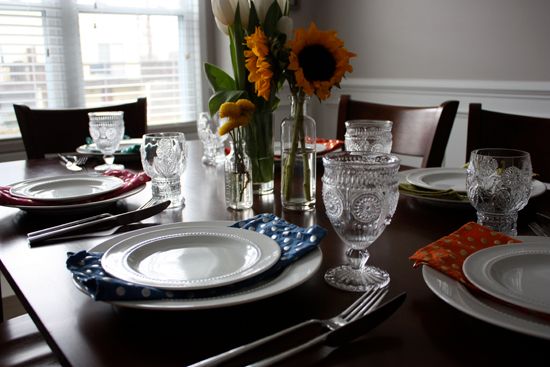

Two quick photos I snapped on my phone. Before and during dinner. 
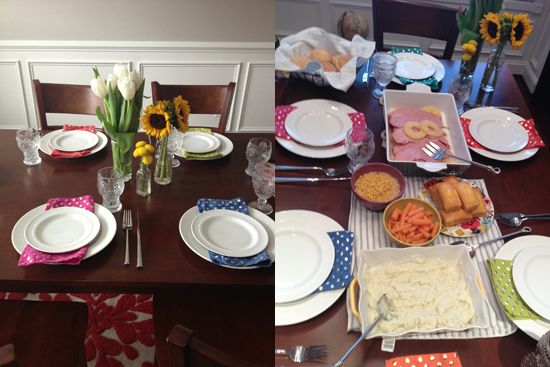

Of course no Spring table setting is complete without flowers. I purchased all of them from our local grocery store. The sunflowers were on super duper sale. Each bunch was being sold for $1.99 'while they last'. It took some restraint not to purchase the entire display. I did snag three bunches thought to sprinkle throughout the house.

Speaking of Easter table settings, iVillage featured the dipped silverware I did for Lucy's 1st Birthday on their Easter Table Decor feature. Check it out here.  

Happy Monday!

29 March 2013

Friday Favorites: Easter Egg Inspiration

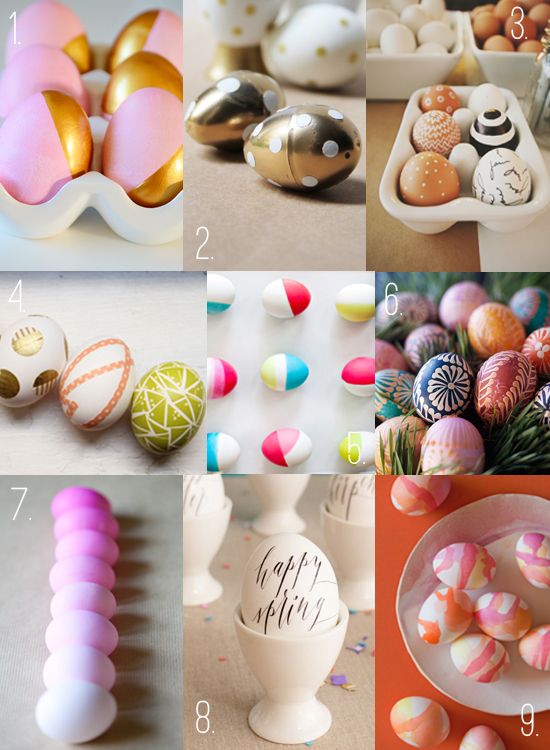
When I was a kid decorating Easter eggs consisted of staining them with colored water and spoons. These days people are using anything and everything they can get their hands on to spruce up their Easter eggs - paint, washi tape and even sharpie markers!

With Easter just a few short days away for my Friday Favorites post I set out to find some unique and easy ways to decorate eggs. Lucy isn't quite old enough to start this fun tradition yet, but I'm definitely collecting of ideas for future egg decorating. Here are a few of my favorite finds.

Also, why didn't we try decorating brown eggs before? I love the look!


1 | 2 | 3 | 4 | 5 | 6 | 7 | 8 | 9

I seriously want to try them all. Luckily Lucy and I have years of egg decorating ahead of us! Is anyone working on any last minute Easter decorations? 

Today I have some friends coming over to help me repaint our downstairs (living room, kitchen and entryway). It's a bit of a monster task but I'm so excited for a fresh look downstairs. Plus I'm having some family over this weekend and it will be nice to have the house looking pretty in time for guests.


Happy Friday!

19 February 2013

Lucy's First Valentine Party

My sweet Valentine.

Lucy had her first real party with other kids this past weekend. My friend Lindsay hosted a Valentine Sweetheart Brunch for 8 kids and their moms/dads. I actually felt like a put-together mom as I managed to pull off bringing both some form of food and making valentines for all the kids. Of course, in normal Jessica fashion I did both the food and Valentines up until 1am Friday night.


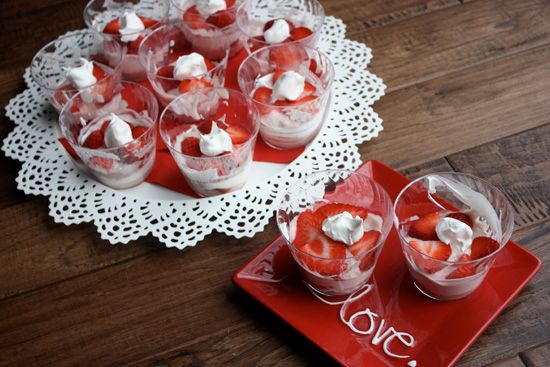
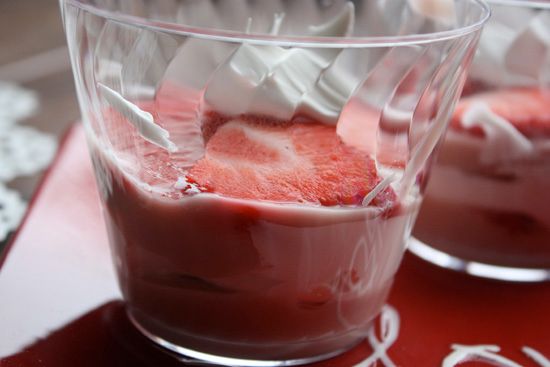
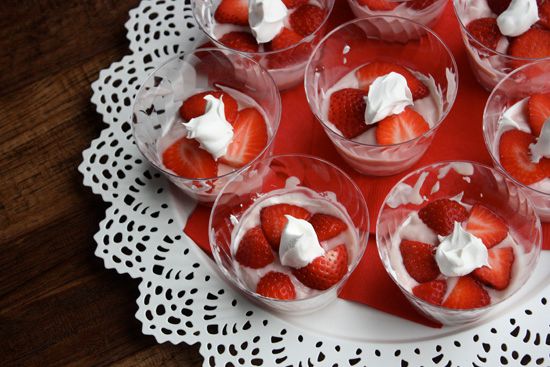
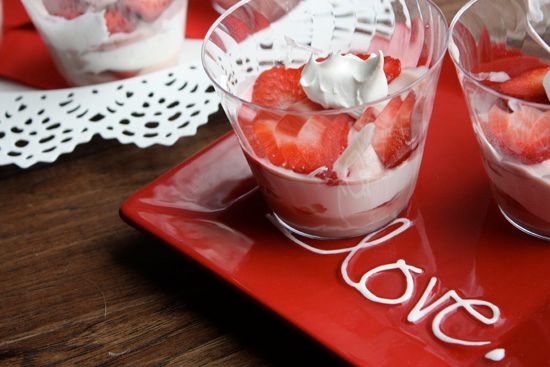
At the request of the hostess I made these great mini parfaits for the kids using three easy ingredients - sliced strawberries, Graduates strawberry yogurt and Cool Whip. 


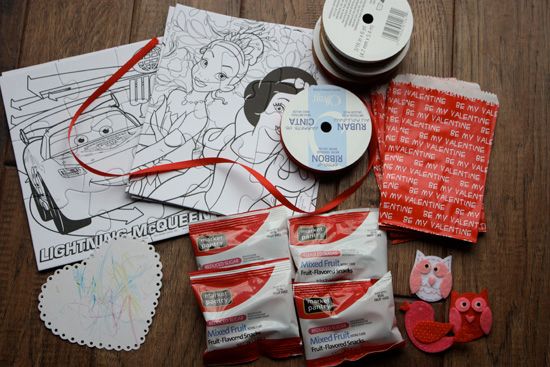
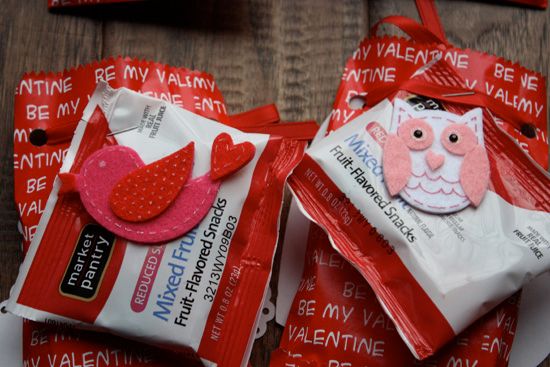
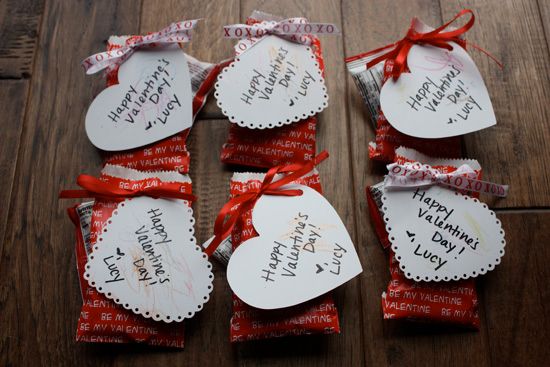
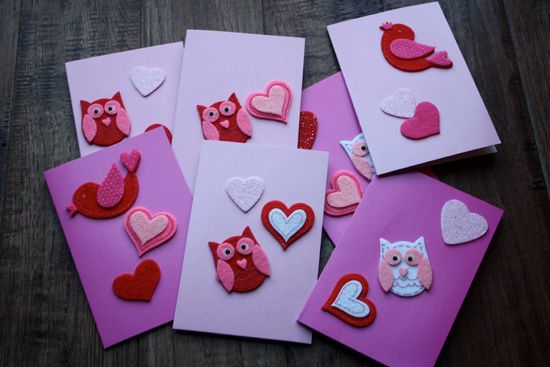
For the Valentines I picked up these puzzles - Disney princesses for the girls and Lightning McQueen for the boys. The ribbon and baggies I already owned and I recently picked up the heart cards and owl/bird stickers for Lucy's other Valentines. I also picked up some reduced sugar fruit snacks as an added treat.


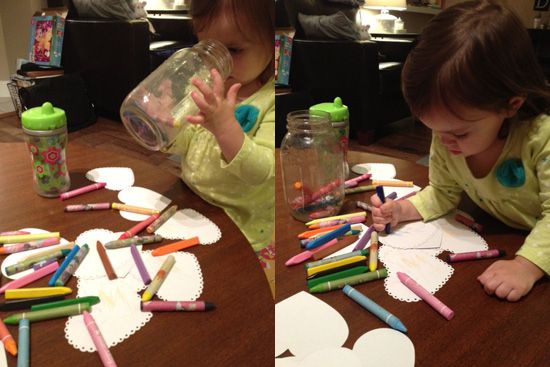
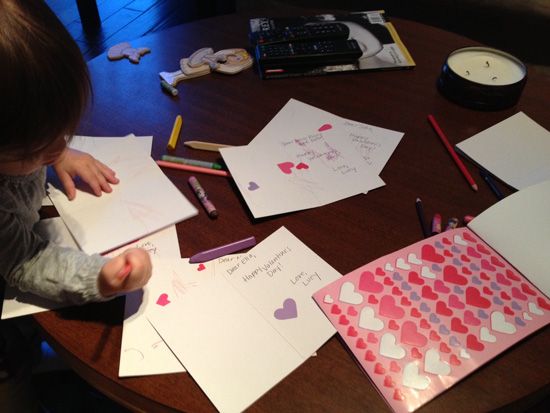
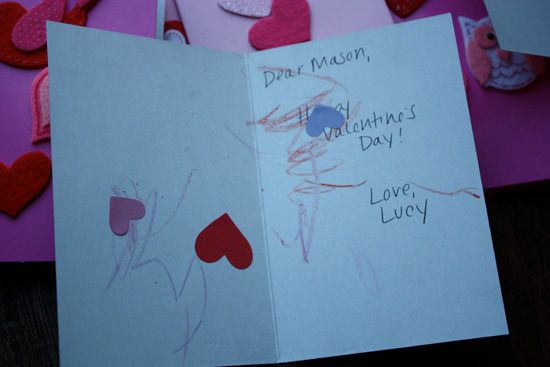
Lucy was in charge of decorating the heart cards. 


I broke each puzzle apart and put the pieces inside the small paper baggies. I tied the bags closed with a piece of festive ribbon and stapled the fruit snacks to the bag.  The birds indicated the boy puzzles and owls for the princess puzzles.


Of course we also had to make Valentines for Lucy's close friends and family. As much as I wanted to do some elaborate, detailed craft I opted for simple because I wanted Lucy to participate as much as possible. We picked up blank pink cards from Michaels along with varying Valentine themed stickers. 


I encouraged Lucy to do as much as she could on her own, with just a little guidance from mommy.


I also made sure to translate her message in each card. 


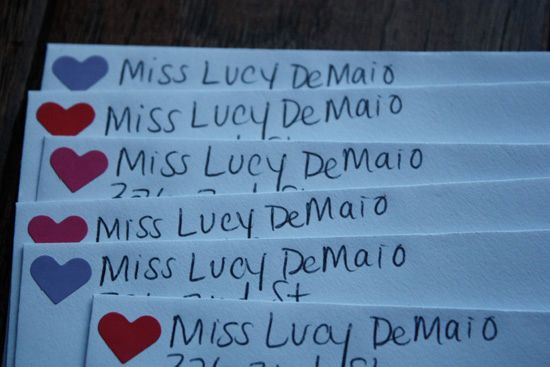
We addressed the cards to all Lucy's friends and family and shipped them out just in time to arrive for Valentine's Day. They were a hit as I received numerous excited texts and Facebook messages as soon as all Lucy's family and friends received their Valentines. 

Hope you all had a fun and love-filled Valentine's Day! Can you believe February is half over??

10 December 2012

DIY Christmas Decor: Felt Leaf Garland


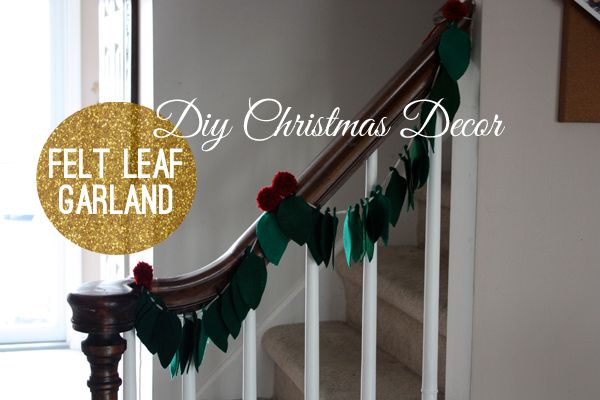
I think garland is one of the simplest decor items but can also be one of the prettiest. Whether strung along a mantle, wrapped around a staircase or just draped across the wall, garland makes a great statement and is such an easy way to decorate. I love all handmade garland. You can pretty much make garland out of anything these days: yarn, paper, fabric, etc. I wanted to make something easy that I could use to decorate the tiny railing we have on our steps.

I found this tutorial by one of my favorite bloggers, Nicole from My oh My. It's a very simple garland made from felt cut into the shape of leaves. I liked the idea of using different shades of green felt. I took my own spin on her version and opted to use a silver yarn to string the leaves and a red yarn to make pom-pom 'berries'. Felt is so inexpesnive and I already owned the yarn so this quick project cost me next to nothing.

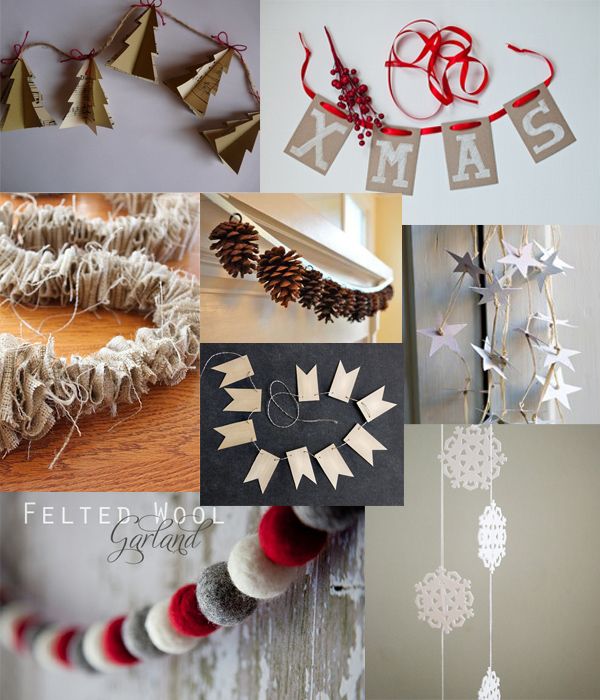
I may squeeze in another one or two garland projects before the holiday gets here. There are so many great DIY garland ideas on Pinterest. The best part is with just a swap of color or change the shape, most of these can be altered for other holidays, too.

All images via Pinterest
 
 
What's your favorite garland?

07 December 2012

DIY Christmas Decor: Painted Reindeer Art

I gave you all a sneak peek at this project yesterday and I just finished it last night. I was inspired by the below glitter reindeer canvas art that I've seen all over Pinterest. While I really like the look of the glitter version (I'm slowly turning everything in our house gold), I'm not too fond of crafting with glitter. We have a few glitter decorations for the holidays and it just ends up with giltter all over our floor, table, etc.  I wanted to use the same idea of a reindeer silhouette, but decided to paint instead of glitter, and use a piece of wood instead of a canvas.


I bought the piece of wood (approx 11"x11") from a local craft store and used some old stain I have leftover from several other projects. The reindeer shape was found online and I just cut it out to trace onto the stained wood. A little white craft to paint inside the outline and my reindeer was ready.


I liked how the silhouette looked on the wood, but when I finished I thought it still needed something. I freehand wrote some script 'Noel' above the picture and added a little decorative 'garland' at the bottom.


Happy Friday!

I linked this craft up to the Clever Chicks Blog Hop!
The Chicken Chick

05 December 2012

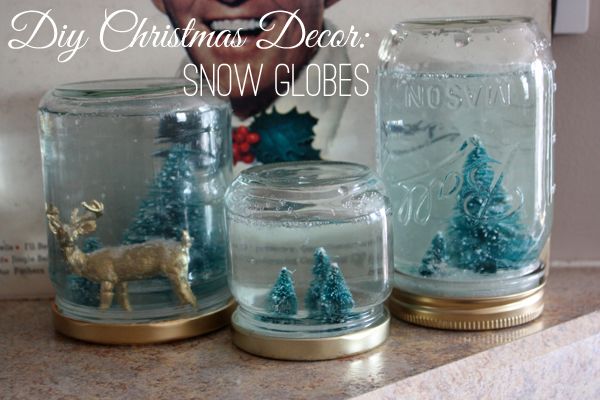
DIY Christmas Decor: Snow Globes


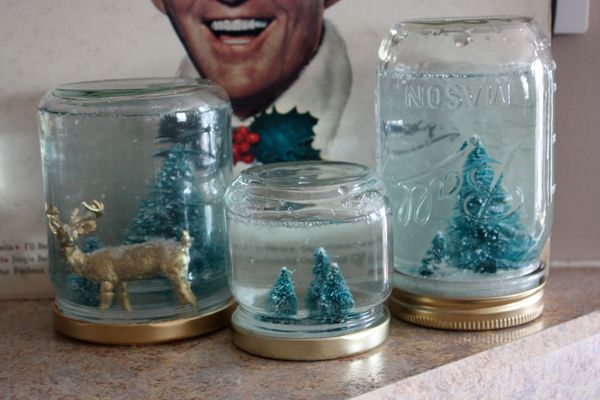
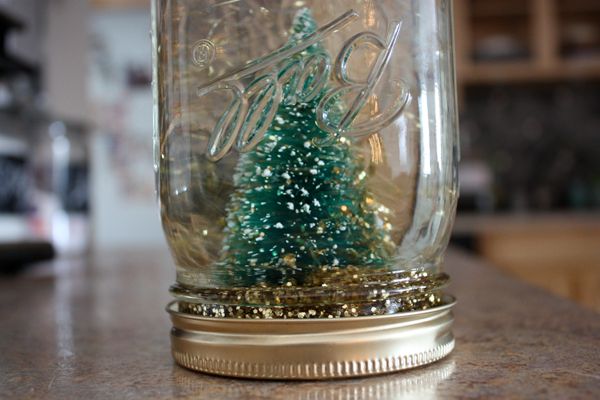
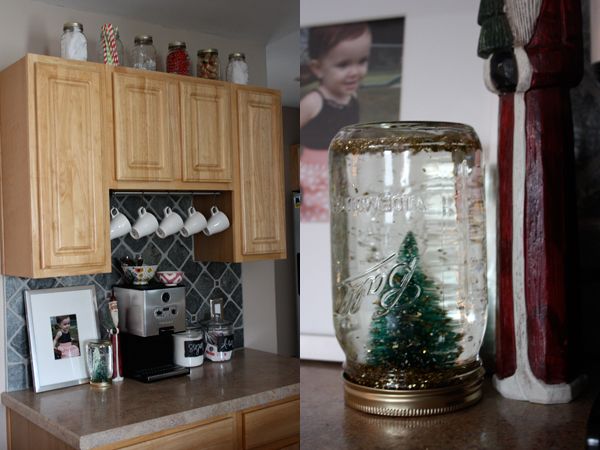
I've seen these DIY snow globes made from old mason or food jars all over Pinterest and I remember seeing similar ones at Anthropologie last year. These globes were one of the first decorations I wanted to make when I decided to DIY a lot of our Christmas decor. 


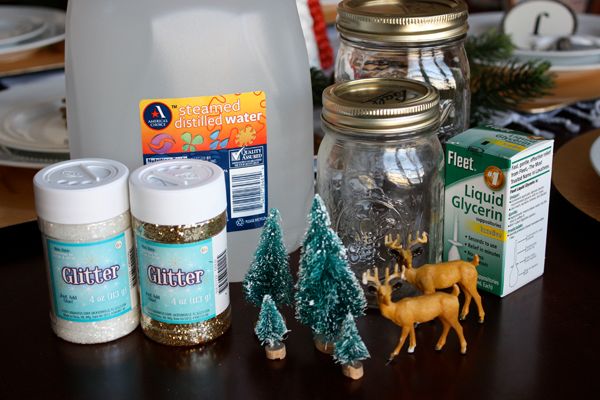
Supplies Used:
- mason or food jars (i used artichoke and salsa)
- distilled water
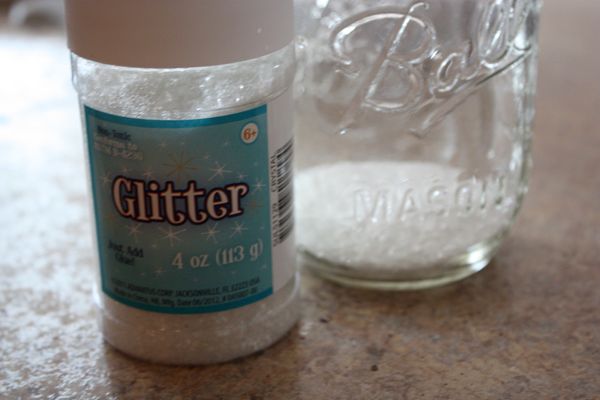
- glitter
- liquid glycerin
- ornaments for inside globes
- sand paper, crazy glue


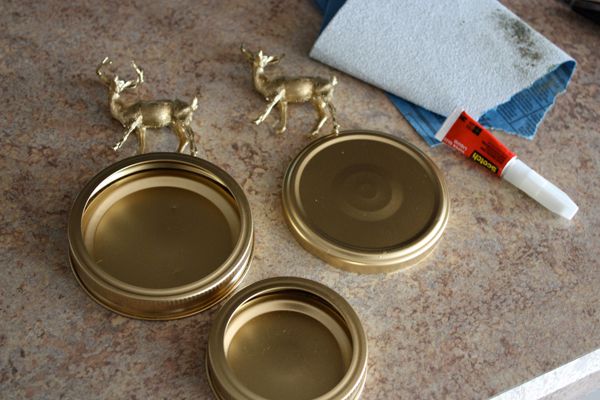
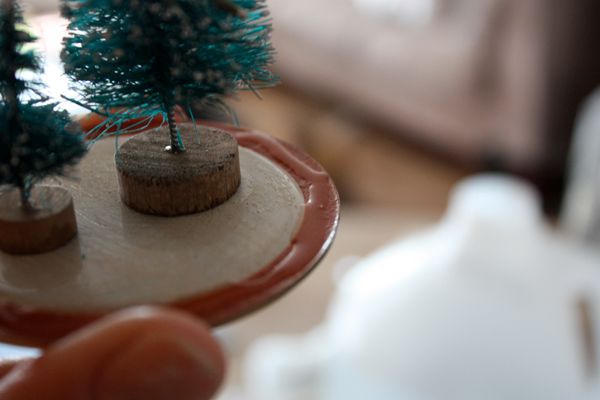
The first thing I did was spray paint all of the lids, even the gold mason ones to keep them all the same shade. I also decided to spray paint the deer figurines, but keep the trees green.


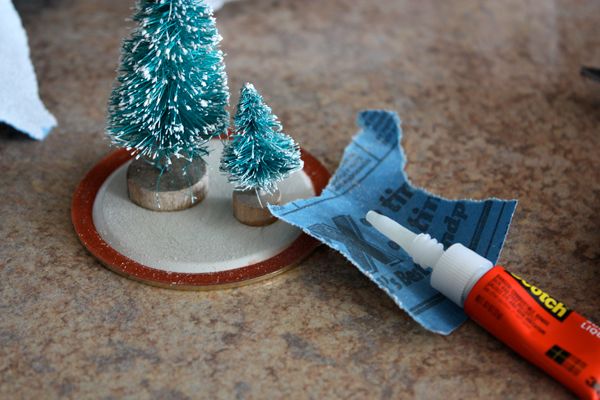
You'll want to sand the underside of the lids to make them easier to stick and use the permanent glue to attach the figurines to the inside of the lid. 


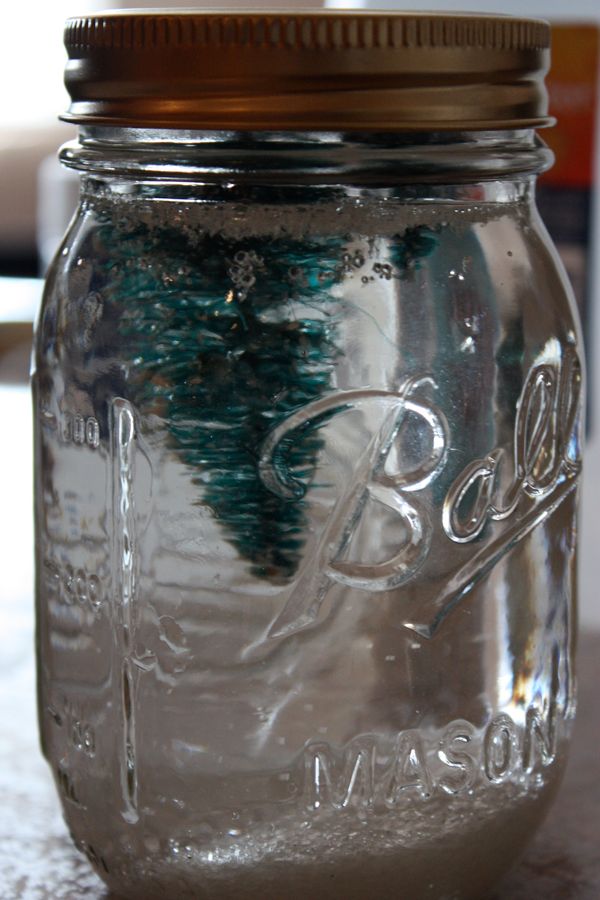
Next, use glitter to fill the bottom of the jar with enough to cover the entire bottom and make a nice layer of 'snow'. After that, fill the jar to the top with distilled water and add a few drops of liquid glycerin. I've read that the glycerin helps the glitter not to stick together.


I wanted to make sure my jars would be sealed tightly with no risk of leaking so I put a small layer of super glue on the rim of the lid before attaching it to the jar. 


Last step is to turn over, shake up your snow globes and enjoy!


A few notes:
- I didn't put enough water in the first two jars (the ones on the right). I left some room for the trees, but evidently left too much. I learned my lesson for the last jar (far left). Since I sealed the jars with super glue I couldn't reopen to add more water.
- I forgot to add the glycerin to the first two jars so I'm honestly not sure how crucial that ingredient is. Although I read that it's used to help the glitter spread when shaken, I haven't noticed a big difference.
- After a few days I've noticed that the water is starting to turn a bluish-green color, I'm assuming from the plastic trees. 

I decided to try one with the gold glitter. I love the look except the fact that you can see the layer of gold glitter floating at the top.  I think I might prefer the look of the gold over the white glitter. 


04 December 2012

DIY Christmas Decor: Decorated Paper Mache Tree

 
My next DIY Christmas decor project was inspired by decorative trees I found at Target a few weeks ago. I really liked the look of them, but didn't want to spend $10-15 a piece for such a simple item. I instantly knew that I could remake these for much less.

 
The three looks I liked best were the feather tree, the knit tree and the berry tree. I lucked out that I already owned all of the supplies needed to decorate and just needed to purchase the trees.
You can buy these paper mache cones at pretty much any craft store for just a few bucks each. I chose to use a variety of sizes since I wanted to have a small group of trees to display.
 
 
To decorate the trees, I already owned Christmas sheet music that I purchased from the thrift store last year, a red beaded garland (hand-me-down from my mom), yarn, and a ton of white feathers left over from an ornament project my mom and I did a number of years back.
 
 
I broke the beaded garland apart and used the glue gun to start lining them around the bottom of the cone, working my way up to the top. I lucked out that there were minimal gaps and the beads fit almost perfectly to cover the paper mache. I glued on bead on the top point to finish.
 
The yarn tree was my alternative to the knit tree, from Target, since I have no knitting skills whatsoever. My compromise was to use a nice sweater-like looking yarn and simply wrap it around the cone for a few layers, stopping every couple of spins to add a dab of hot glue to hold. The was the easiest and fasted tree to make.
 
For the feather tree, I chose the largest, thickest feathers and hot glued them 'facing' down starting along the bottom of the cone, I filled in the gaps underneath with shorter pieces to cover any showing paper. I simply worked my way up, using shorter pieces as I went up with each layer. Looking back I think I should have painted the cone white to start with, but I'm still really happy with the end result.
 
The last tree was made with Christmas sheet music that I punched into the shape of a heart. I originally wanted to replicate the sheet music trees that I saw at Anthropologie last year, but wanted to keep the consistency of the cone shaped trees. This was my alternative. Starting at the bottom, I simply put a dab of glue just on the bottom tip of the heart, leaving the top of the hearts loose. I tried to alternate the layers a bit to keep them from looking too 'perfect'.
 
 
The trees are now the centerpiece for our dining room Christmas table setting. You can see a peek at the table above. Most of the items for our table were purchased at Target, Michaels or AC Moore. I wanted to keep things pretty clean, but festive looking.
 
This project probably cost me around $8-10 total to create since I already owned all of the supplies excluding the trees. A much more cost effective version than the Target trees!

03 December 2012

DIY Christmas Decor: Decorating with Mason Jars


I spent this past weekend working on some homemade holiday decorations for our home. You might remember me telling you how I really don't decorate for the holidays. I never have. I think part of it has to do with the fact that my parents go all out for holidays like Christmas. My childhood home growing up was (and still is) a Winter Wonderland. We had a minimum of 3 Christmas trees each year, sometimes more. There was always lit garland around the steps, a giant lit wreath in the foyer window, every frame on the wall and glass table top was wrapped in festive gift wrap. Daily hand towels and rugs in the powder room were replaced with ones feature Santa. The list goes on.
 
I put a tree up the first two years in our house, but even that sort of dropped off over the past few years. Now that we have Lucy, I feel it's important for us to start really celebrating and enjoying holidays so she can enjoy them, too. I did a little Valentine's Day decorating last winter, skipped over Easter (I can't get down with pastels), the summer holidays and Thanksgiving. Now Christmas is here and it's time to decorate.
 
One of the easiest projects I took on wasn't even a planned one. My in-laws are in the process of moving and in doing so gave me a box filled with mason jars, knowing I could get some good use out of them. I initially started to use them to store the scraps and leftover supplies from other projects I was working on, but quickly realized I could also use this storage idea as a decorate piece for the holidays. Not only was this one of the easiest projects, but it was pretty cost effective, too.

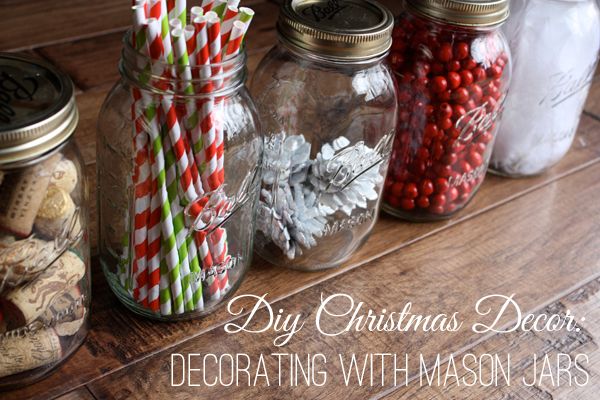
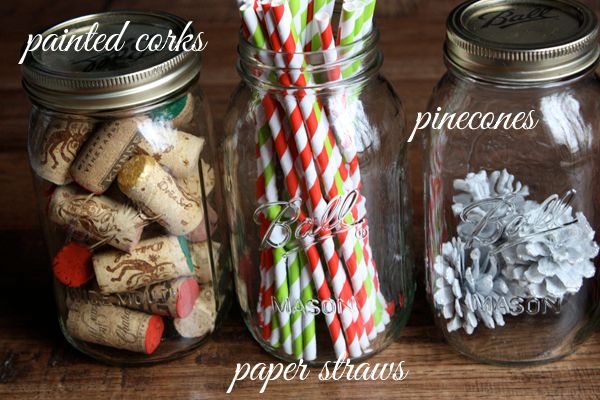
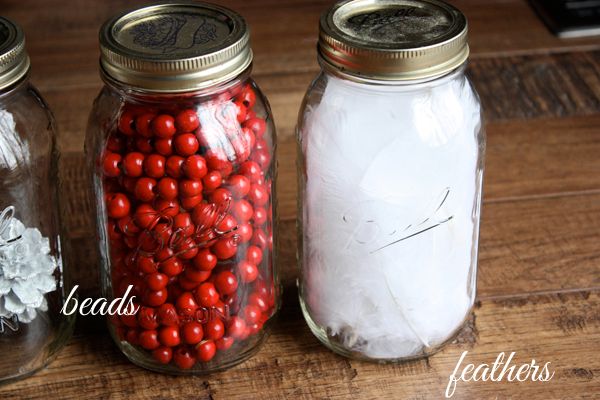
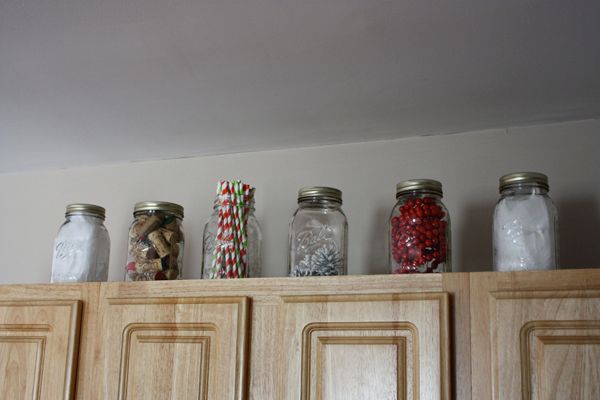
The jars are filled with corks, paper straws, pinecones, beads and feathers. The corks were the only DIY I did for this project, dipping the ends in alternating gold, red and green paint to give them more of a festive look. I purchased the paper straws a few weeks back because I loved the look and knew I'd find a use for them. The pinecones were left over from our dining room table setting (to be shared later) and the beads and feathers were leftover from another project I was working on (that I'll share with you later this week, too).


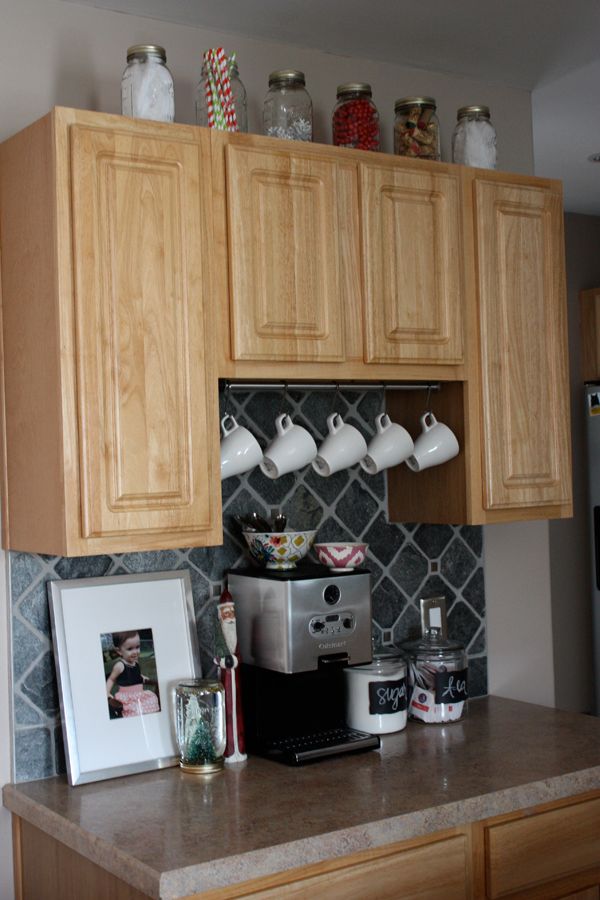
Not only was this easy to make, but it's also pretty easy and clean looking to display. I chose to put our mason jars on top of the cabinets on our breakfast bar in the kitchen. I catch myself looking at them a lot from our living room as the jars actually make the cabinets appear taller. I might need to store mason jars up there year round.


I have more projects to share with you this week!