I don't have a green thumb. I will probably never be able to maintain a successful garden. I don't even know the names of most flowers. What I do know is what looks pretty. I also know how to take something done professionally and learn to DIY it for less.
My grandmother's birthday was last month. Buying gifts for my grandparents is hard. Really hard. What do you get for an 82 year old woman who has everything she needs, needs nothing, and even has everything she doesn't need? A pretty flower arrangement. And why spend a fortune on one when you can do it yourself?
This DIY was super easy and super inexpensive. Anytime I get flowers from Jordan I always keep the vase. I have tons of vases that I've collected over the years. I never had a plan for them but knew I would figure something out down the line. All I needed to buy was some tape and the actual flowers.
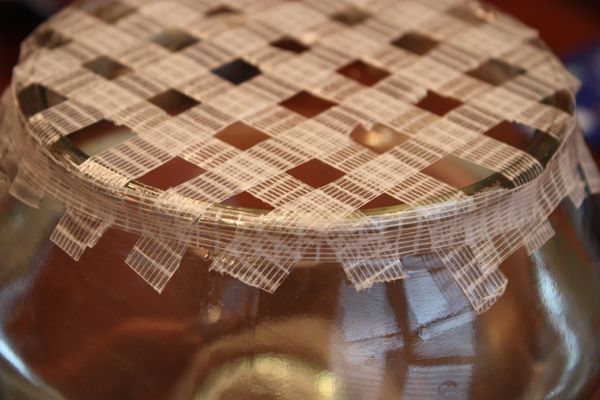
First step is the most important and pretty much what makes or breaks the arrangement. I took clear duct tape and cut it into quarters making skinny strips. I'm sure there's fancy professional florist tape that actually is this size, but I settled for the duct tape purchased for cheap from Walgreen and the tedious task of cutting it into pieces. Ah, well..
Once I had my strips cut I ran them across the top of the vase, criss-crossing them like the top of a pie leaving small square openings between the strips.
Now you could do this project using just one regular sized mixed bouquet found at the store. I bought two because I wanted to add sunflowers to be a statement flower and of course they were in a separate bouquet than the one I wanted to use. I spent $15 in total on the flowers for two bouquets, but you don't even need to spend this much. I had some leftover flowers that I stuck in a vase for myself. Side note: Whole Foods has some of the best flowers. I highly recommend.
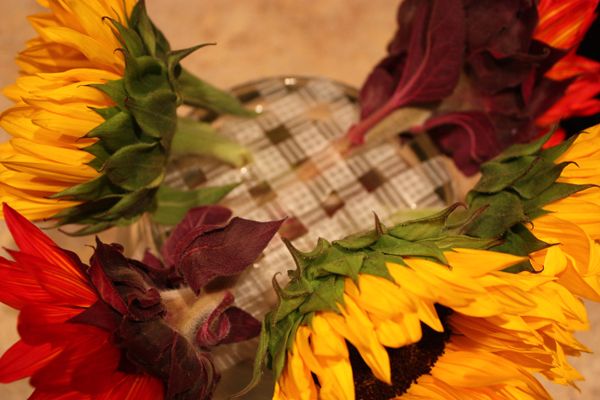
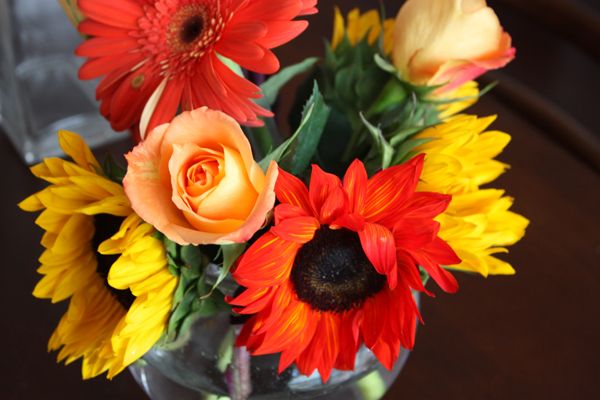
I trimmed all the flowers to the necessary length. To start, I picked the largest, statement flowers and put them into the vase through the holes between the tape, spacing them out as I saw fit. The criss-cross tape holds the flowers upright so you don't have a bunch of droopy flowers bumping into each other and moving around.
After the large flowers were in, I started to fill in with the next size and worked my way smaller: in this case it was roses, followed by daises, carnations, etc.
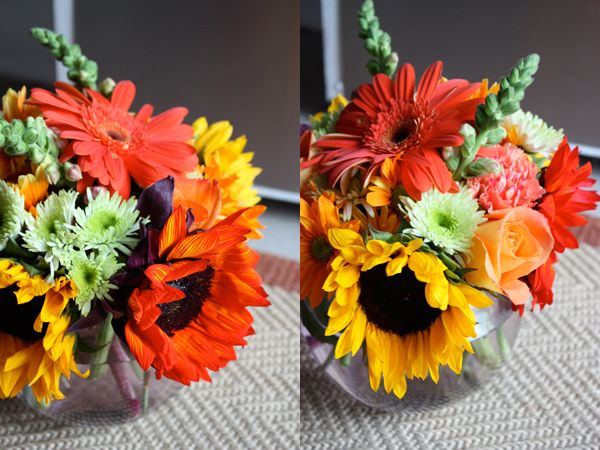
Lastly, I added in all the accent pieces, or fillers: spider mums and whatever those green stemmed things are below. Like I said, I don't know the names of most flowers. I just had to 'google' spider mum. You want to just move pieces around and mess with it a bit until it looks pretty and finished. One thing I would add to the arragement that I did not originally do is find a piece of ribbon that matches the arrangement and tie it around the neck of the vase, covering the ends of the tape so they don't peek through the flowers.
That's it. Honestly. The hardest part was cutting the strips of tape, and to even call that task hard is stretching the truth a bit. If you come across actual florist tape, the time it took me for this project could be cut in half. My grandmother absolutely loved the flowers. She was so pleased with the arrangement and the fact that they lasted almost three weeks that she requested I make her more!
Here are a few quick shots of the arrangement I made for her last week.


Your arrangements looks SO beautiful!!! :)
ReplyDelete