
Supplies used:
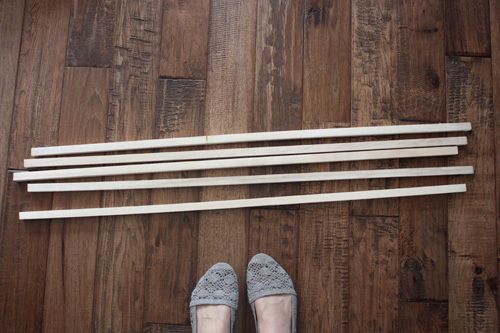
- 5 strips of 5/8"x36" hardwood square @ $2.14 = $10.70
- 4 mix and match hooks ($2.98, $2.98, $3.29, $4. 49) = $13.74
- wood stain - $4.78
- wood stain brush - $0 (already owned)
- wood glue - $0 (already owned)
- screws - $0 (already owned)
- drill
- screwdriver
TOTAL: $29.22
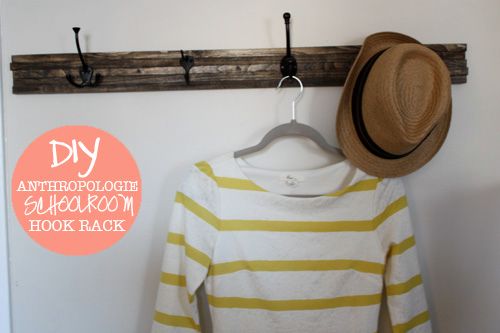
What I love most about the Anthropologie version is the imperfections. I'm a big fan of rustic, rough wood and natural metals. I initially was going to use a solid strip of wood pulled from a second, more weathered pallet I have, but decided that I wanted it too look as close to the Anthropologie version as possible and decided to do 5 small strips of hardwood square.
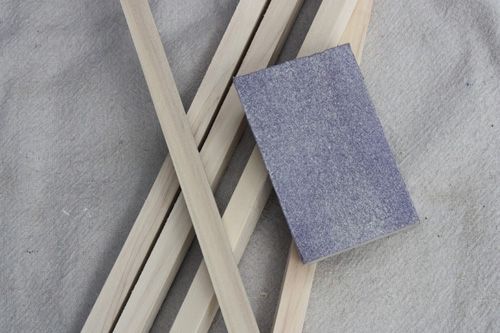
To start, I gave the wood strips a little love with my sanding block. Some of the edges were a little rough and I wanted to start with a smooth surface for staining.
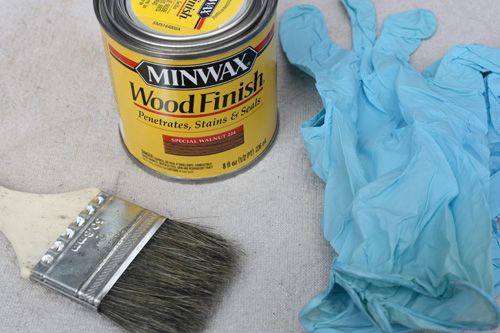
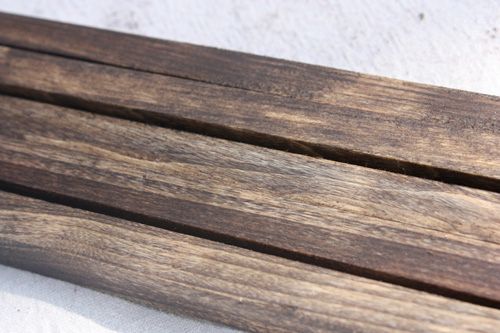
Once sanded smooth, the strips were ready to stain. I stain I chose was 'Special Walnut,' which is a darker stain than on the Anthropologie rack, but better matched the furniture and style of our bedroom. I learned my lesson this time and used rubber gloves to stain! No more stained, oily hands. I did several coats to get the desired color.
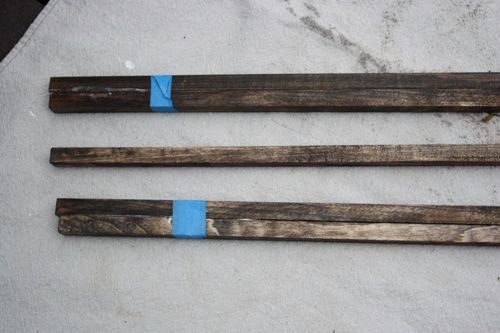
Once the stain set, I used wood glue as a base to hold the pieces together initially. Since the wood strips aren't perfectly straight, I had to try a few variations to get them to lie as flat against each other as possible. I glued two pieces together first and secured with some tape until it dried. I then added another piece, and so on. It would have been better to use some sort of clamp rather than the tape because I still had a few small gaps after the glue dried. Unfortunately I didn't have any clamps to use.
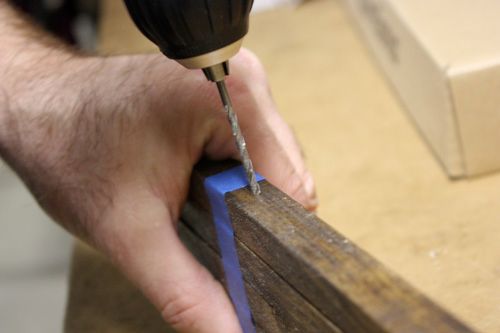
Since wood glue wouldn't be enough to keep the rack from falling apart with any weight, we needed to add some screws vertically through the strips to hold them together. This is where my dad helped me out. We selected screws that were long enough to go through at lease three of the strips and alternated three screws going down and three going up. Because the wood strips were less than an inch thick, we made sure that a small pilot hole was drilled first to avoid the wood splitting when adding the screws. We used the drill to screw in most of the screw, then used a screwdriver and did the last few turns by hand, again to lessen the chances of the wood splitting with the power of the drill.
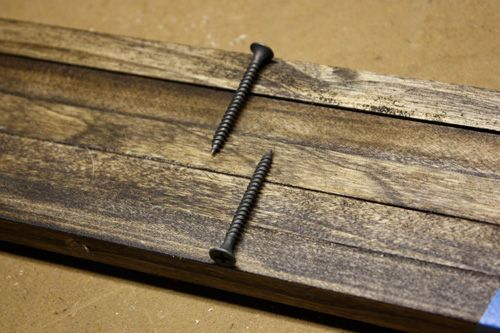
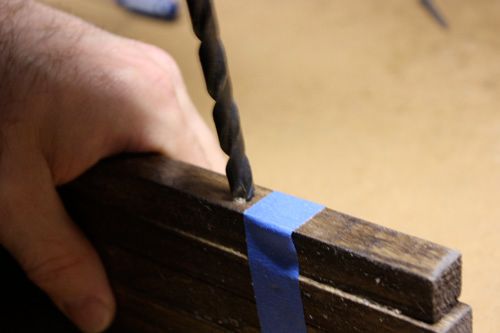
Tip: After drilling the pilot hole with the small drill bit, we took a larger drill bit (the diameter of the head of the screw) and drilled a small indentation in the wood. We did this so when the screw goes into the wood, it will lie flush and not stick out.
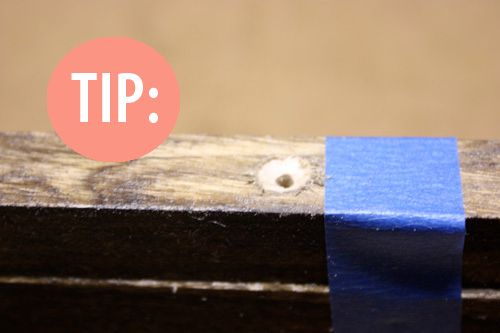
As you can see, the screw is barely noticeable.
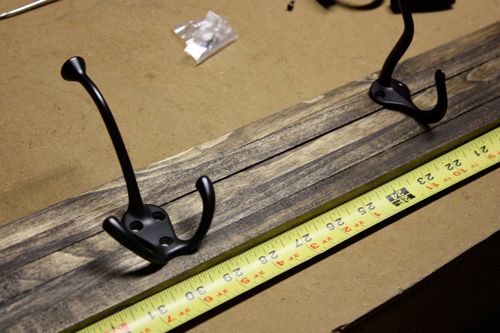
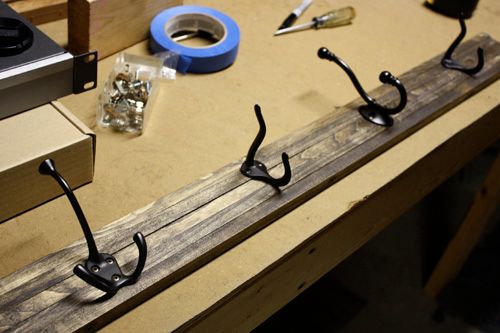
Next, we needed to measure out where each hook was going. I decided to use 4 hooks of varying styles/sizes like the original rack. Two smaller hooks of the same type and two larger hooks of different styles. I alternated the hooks accordingly: large hook - small hook - large hook - small hook. We marked where the holes were and attached the hooks. Note: When doing this, you need to make sure you aren't attaching the hooks where one of the veritcal screws are in the wood or they will end up running into each other.
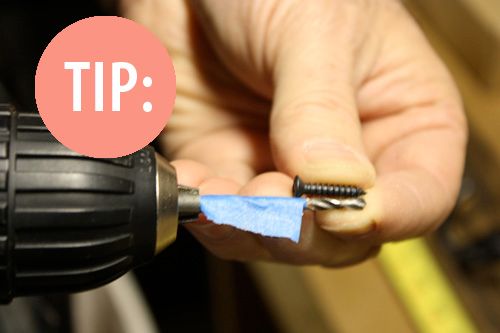
TIP: We had to use different screws than the ones that came with the hooks because some of them were so long they would have gone through the 5/8" strip and out the back. Luckily my dad had a stash of screws and we just enough in the perfect length. In order to make sure that the pilot hole didn't go through the back of the wood strip , my dad taped off the drill bit at the end of the length of the screw. That way he knew once he reached the tape, to stop drilling.
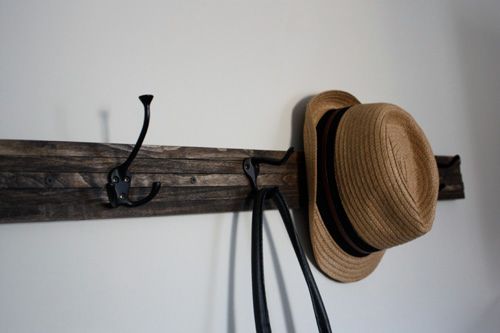
The final step was hanging the hook rack. It was pretty crucial that we were able to screw the rack into at least two studs in the wall since I planned to hang things with a decent amount of weight. Depending how much junk I toss in it on a given day, my purse can be fairly heavy. We used 5 screws total to attach the rack to the wall, with the first and fourth screws each secured into a stud. Again, you need to be aware of where the vertical screws are so that you don't try to drill the same spot. We used the same method of drilling the pilot holes first, and hand screwing the screws in to avoid the wood splitting.
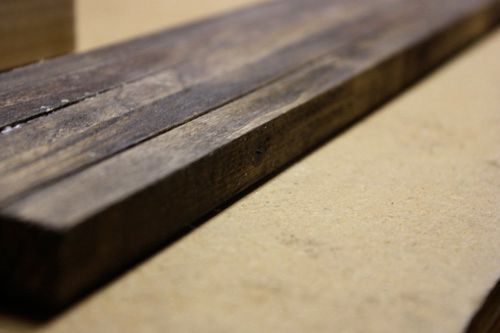
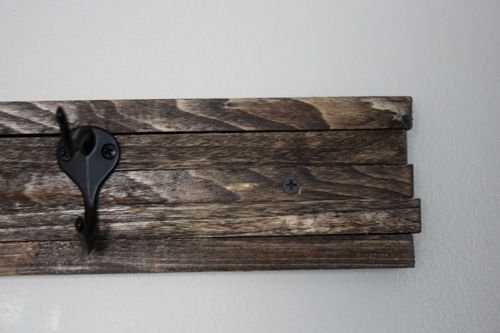
As you can see, I intentionallly staggered the wood strips so the edges wouldn't be perfectly straight.
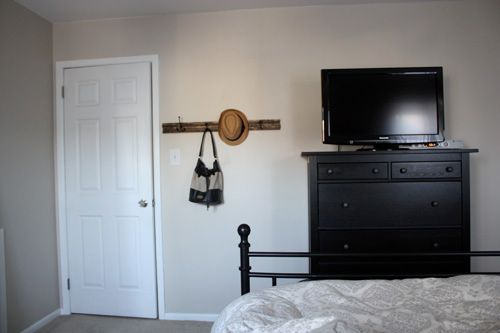
Here's a view from across the room so you can see how it looks in proportion to the rest of the wall. I haven't showed you all any recent pictures of the master bedroom. I'm doing a few finishing touches on the bath (including adding some much needed wall art), and have been making a few small changes in the bedroom (like my terrarium project). Bye-bye wall shelf above the bed. Hello big white frame. I can't wait to show you all how it looks once I'm finished.
For now, I'm enjoying my Anthro inspired hook rack made for a third of the price!

looks amazing! Can't even tell the difference between yours and Anthro's!
ReplyDeleteThank you!! I'm really happy with it. And I'm using it a ton, which is even better.
Delete