
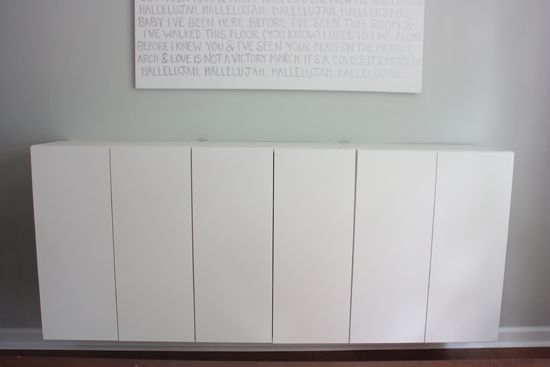
Our fauxdenza is finished and we couldn't be happier. In the last post, I showed you how we built the cabinets and hung them along the wall in our kitchen.
For fun, let's rewind even more and see how things looked pre-shelves. Back when we just had a teeny bar cart.
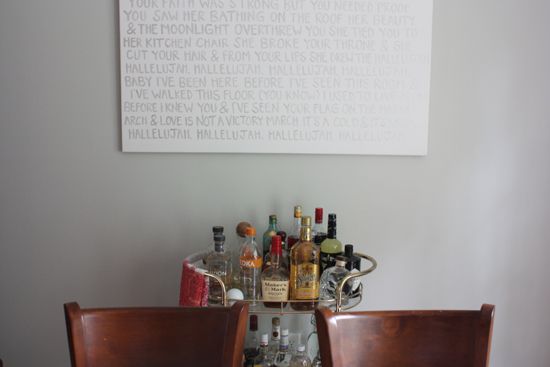
Don't get me wrong, I love that bar cart and it was an awesome thrift find. Unfortunately, things looked so awkward when we just had the bar cart alone because it was so small and that space is so large. We were in need of a larger, more practical storage solution.

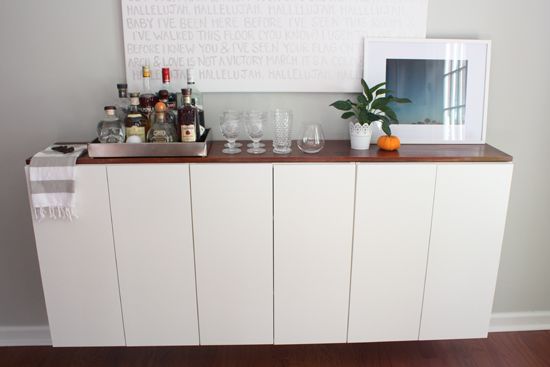
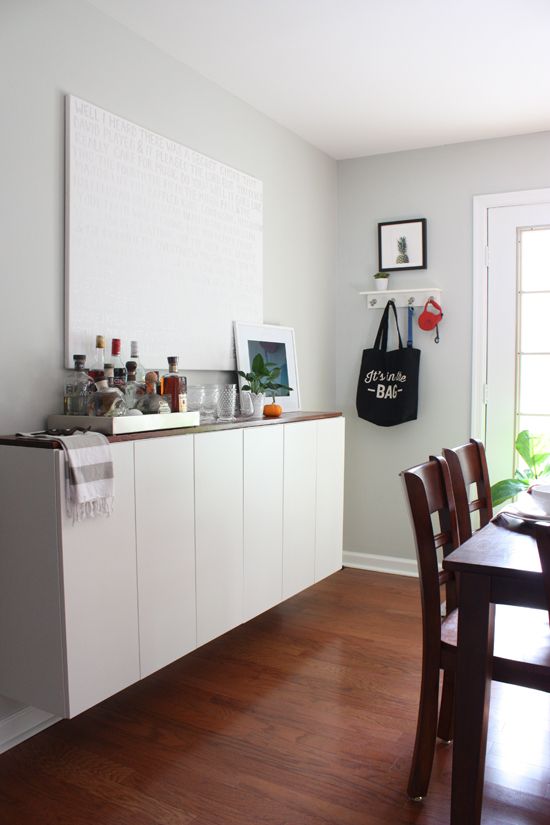
Now that the fauxdenza is finished, that side of the kitchen finally looks complete. The fauxdenza looks like its always been there. I can't quite explain why, but that part of the kitchen also looks larger to me, now. I think choosing a narrow storage solution that ran along the length of a big wall was a smart choice over adding a hutch or large piece of furniture that came over a foot from the wall.
We spend so much time in our kitchen that it feels good to have this project complete. (Now to find time to work on those french doors next..)

So how did we finish it?
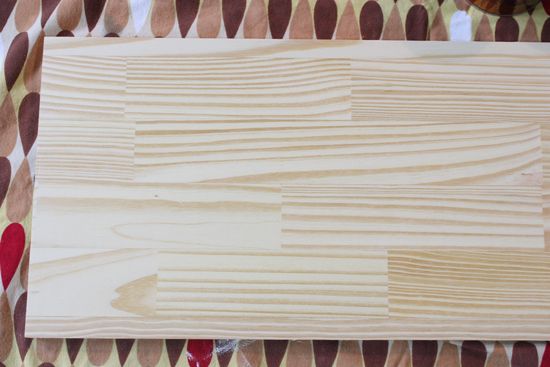
Once the cabinets were hung, all we had left to do was stain and install the top. I found this gorgeous solid wood panel at Lowes. It was made for staining and the design of the wood planks is gorgeous. By luck, it just happened to be 1'x6', the exact measurement of our fauxdenza. (As a side note they also had other sizes with smaller or larger lengths and widths. )

Once I saw the planked design I was sold and you couldn't convince me to get a piece of wood cut down to size. Here is a closer look at the design of the wood, pre-stain.
And how things look mid-stain. The color I chose was Rust-Oleum American Walnut. I wanted something that would compliment the kitchen table set and my usual go-to for all things stain (dark walnut) just wasn't going to cut it here. I needed a warm, red tone. This is actually the color I should have done our dressers in our bedroom to better match the nightstands, but oh well.
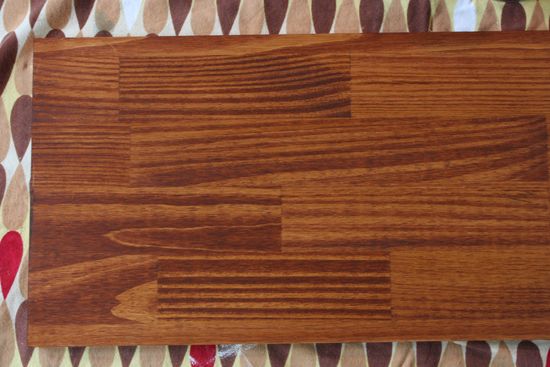
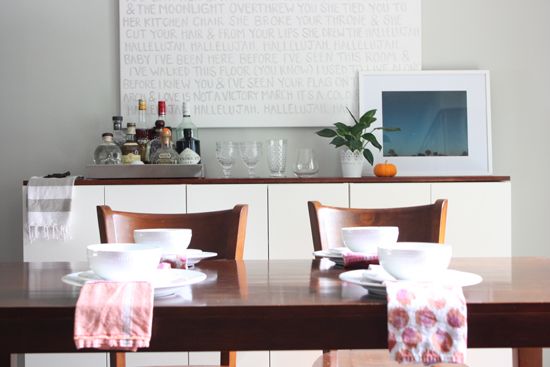
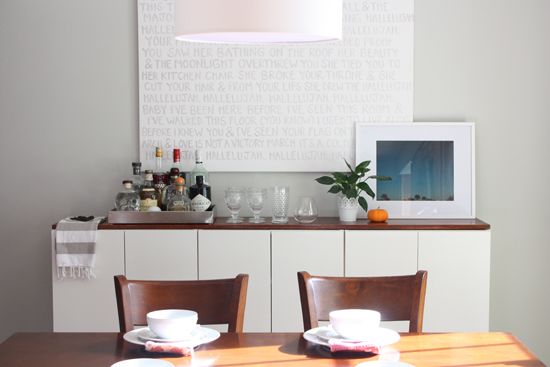
Three coats of stain and two coats of polyurethane (with a very fine sand between, this is key) was all it took before the top was finished. I couldn't wait to put the top on and start filling up those cabinets and styling the top. We decided right away that this was going to serve as a bar in our kitchen.
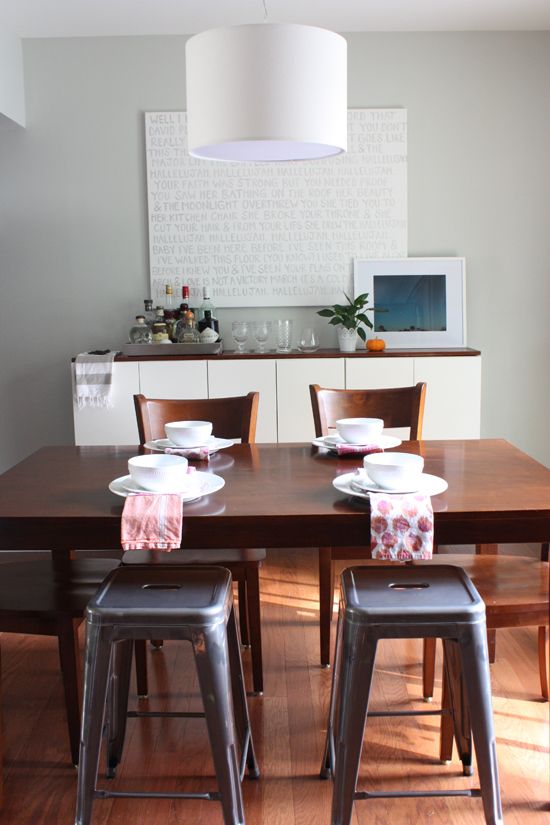
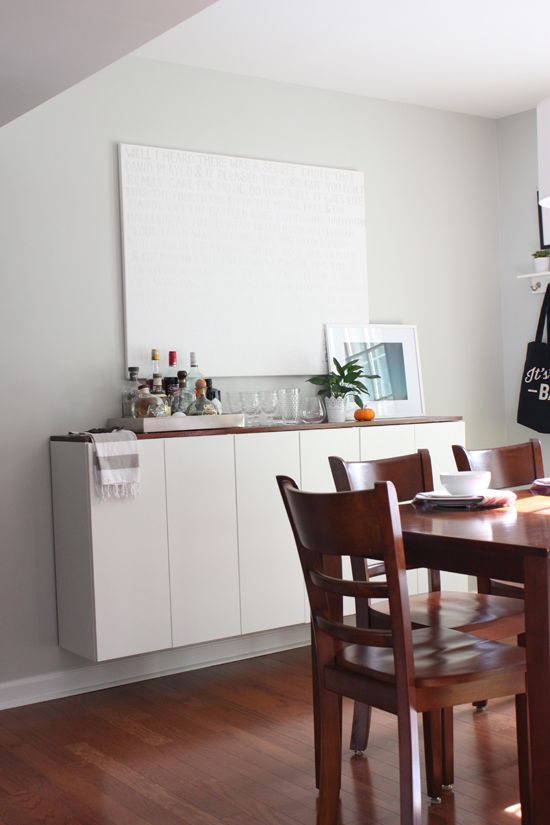
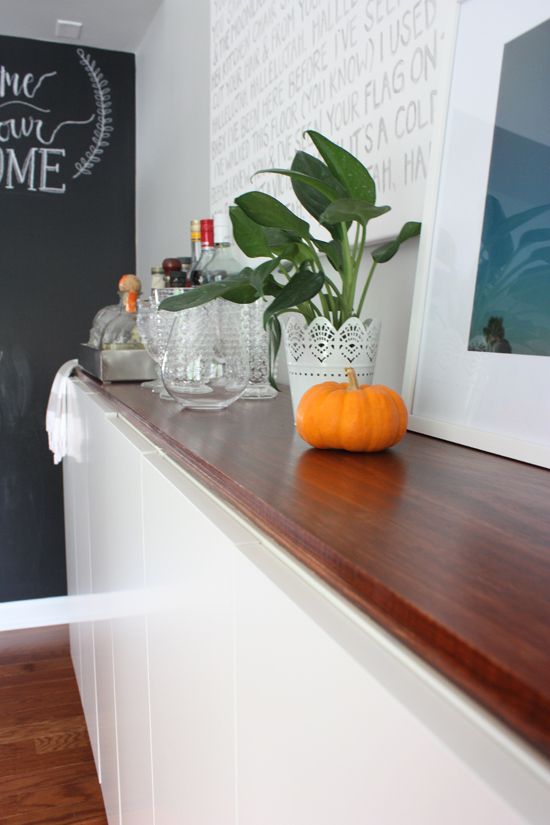
We opted not to add wood pieces to the sides of the fauxdenza because we liked the look of a single wood top better. For the look of our kitchen the wood sides would have been too much. The styling of the fauxdenza needs some tweaking, but for now I'm happy with how it looks. I also love the pop of color from my Honey Lake Studio print.
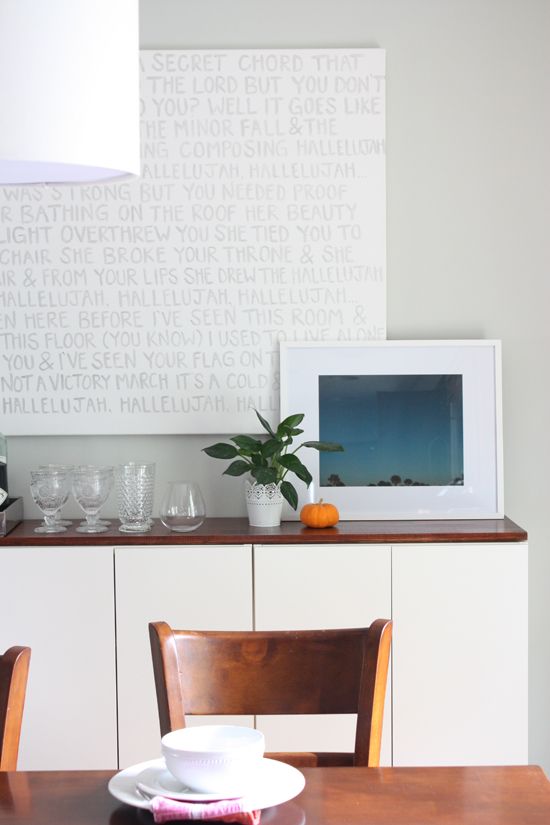
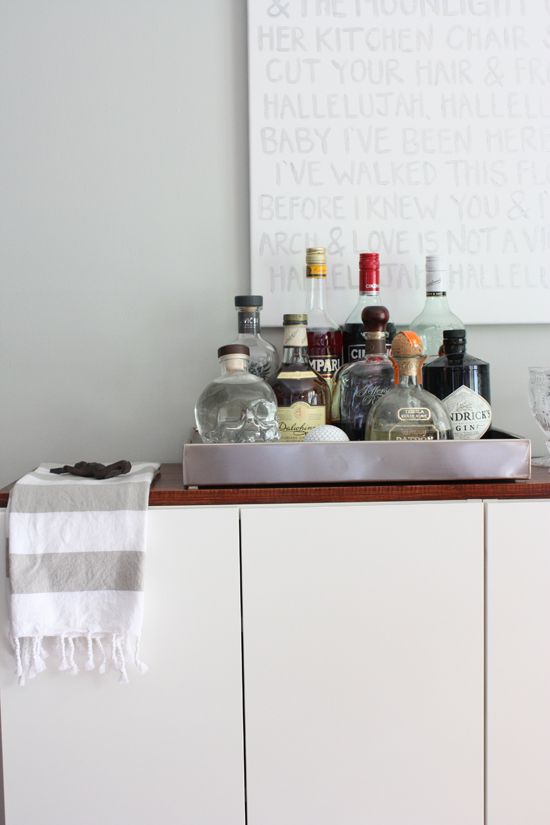
To prevent drips from ruining the finish of the wood, I'm storing all our bottles in this metal tray I scored from Target a few months back. I'm excited to finally get to display some of my pretty glassware from Anthropologie.
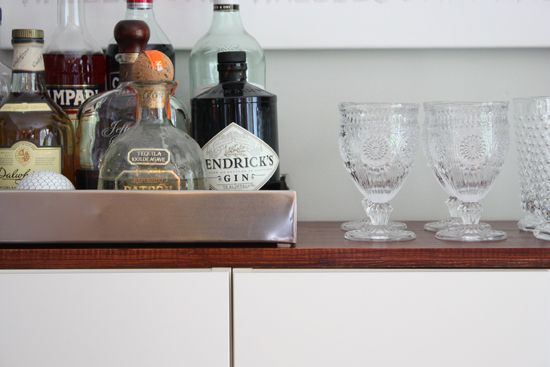
A big pro to having this fauxdenza is that we now have a lot of additional storage space in our kitchen. I wanted to be able to store glassware and other bar accessories in the same area as our 'bar' as opposed to keeping them in the dresser in the adjacent room. Now we finally have everything in one place.
You can see the vast amount of storage we now have. I'm not done filling those shelves, yet, but I was happy to clear our cookbooks off the top of our fridge and to be able to tuck some of the lesser used bottles away.
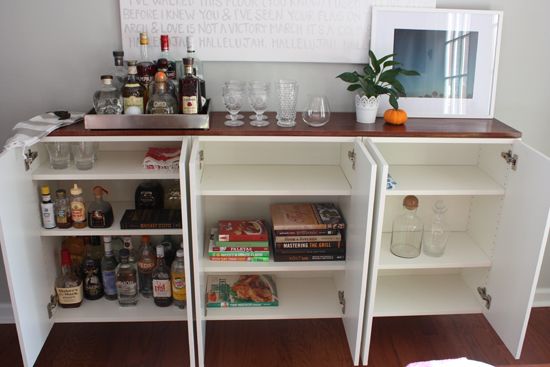
Yes we have a lot of booze, but Jordan and I both work (well I used to work) in the booze industry. In the words of Bethenny Frankel "Booze bought this house." So for us it's totally appropriate to have a piece of furniture dedicated to our booze.

A few shots of the beautiful wood top, because I'm pretty proud of my stain job here. I have definitely improved my staining skills since tackling the dressers. This top is so much smoother and looks so much nicer than my last project. As I mentioned above the key is a good, fine sand between poly coats. Makes a huge difference in the feel of the finish.
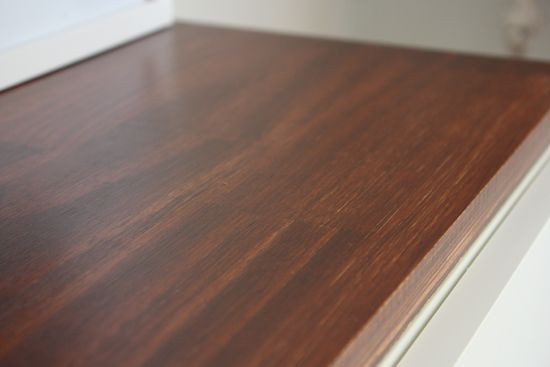
Many of the tutorials I read used a veneer edging on their wood tops, but we liked the look of the raw edge and decided to keep it as is.

I'm still deciding if I want to keep the shelf and frame on the wall next to the french doors. The hooks are convenient for holding the dog collar and leash, but I'm wondering if it looks too cluttered now with the fauxdenza. We are also still contemplating installing a long shelf above the fauxdenza to store some of our pretty glassware. This would mean we would need to find a new home for our painted canvas.
What do you all think? Keep the painting or install a shelf? Keep the small shelf or find a new home?
It all looks perfect. You guys did an excellent job. I wouldn't touch a thing. Now I want one for dining room!
ReplyDeleteLove the way it turned out -- looks as if it has been there all along! Very impressed(:
ReplyDelete